Benefits of Styrofoam
Technologically, the insulation of structures is based on the creation of the effect of thermo-water using an air cushion.
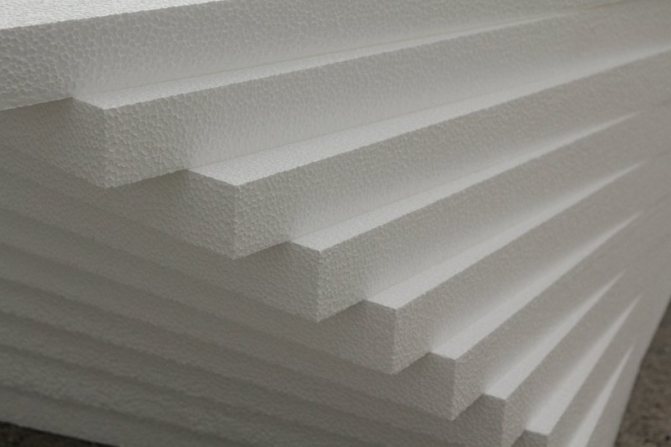
Is it possible to insulate the ceiling with foam? Polyfoam is one of the most economical materials for thermal insulation, consisting of styrene cells with air. Material thickness 50 mm is comparable in technical characteristics with the following materials:
- concrete coating 1900-2000 mm; brickwork 850 mm; mineral wool 90 mm thick; wood 180 mm.
The material is optimal for external insulation of ceilings of permanent and temporary structures, since it has the following advantages:

- low thermal conductivity - its performance is comparable to extruded polystyrene foam and mineral wool; lightness - due to its low weight, it can be used inside and outside on various surfaces; convenience and ease of installation - to insulate the ceiling with foam plastic with your own hands, the simplest set of tools and minimal skills are enough; safety - in order to insulate the ceiling with foam plastic, no additional protective equipment and devices are required; availability - due to the low cost, the insulation of ceilings does not require large financial costs; ensuring good sound insulation; low hygroscopicity; ability to withstand loads; environmental safety; service life of at least 20 years.
Pros and cons
Each of the methods is endowed with advantages and disadvantages.
Frameless way
The frameless installation technique involves finishing the wall with plaster. This is due to the need:
- To "refine" the appearance of the building - white sheets of polystyrene with visible dowel caps and foamed joints create the impression of unfinished construction.
- Expanded polystyrene of any brand is subject to destruction under the influence of ultraviolet radiation, an opaque "covering" material is used for protection.
- The structure of the foam does not allow it to effectively resist destructive mechanical stress.
Advantages of the method:
- The minimum number of technological operations.
- Short lead times.
- Long service life.
The advantages are slightly offset by the difficulties that may arise for a master who does not have plastering skills:
- Additional costs for skilled labor.
- Finishing must be started immediately after the installation of the insulation and finished as quickly as possible, minimizing the time spent by the foam under the sun's rays.
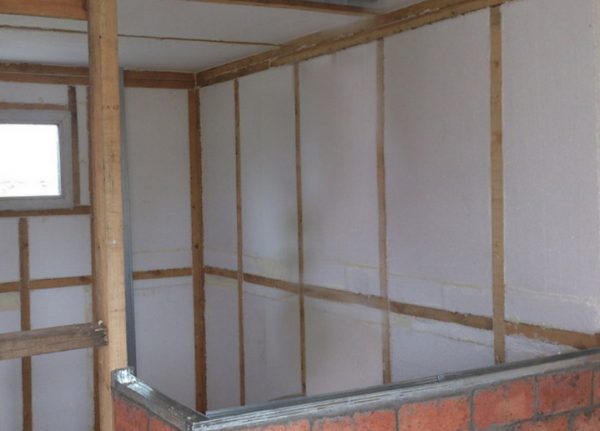
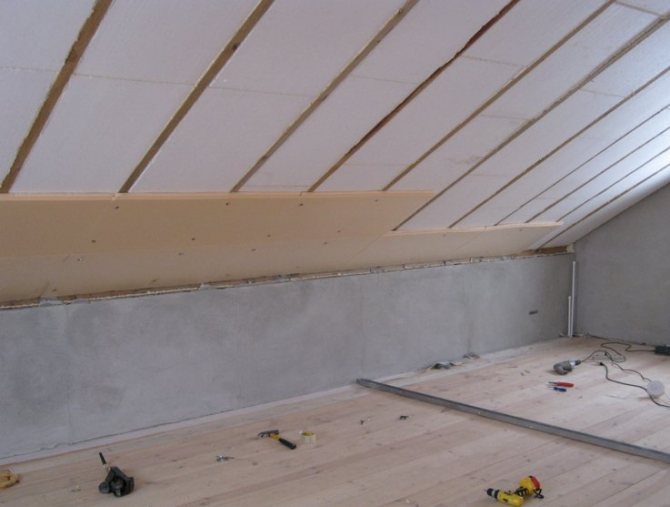
Frame version of insulation
The method consists in preliminary installation on the walls of the building of the frame, between the logs of which the insulation is installed. The finishing is fixed in the crate.
Wireframe method:
- Suitable for use with foam with a density of 15 kg / m3.
- Saves building materials for fastening the battens.
- Available for beginners and inexperienced craftsmen.
- The outer finish and waterproofing layer reliably protects the thermal insulation from mechanical damage and weather.
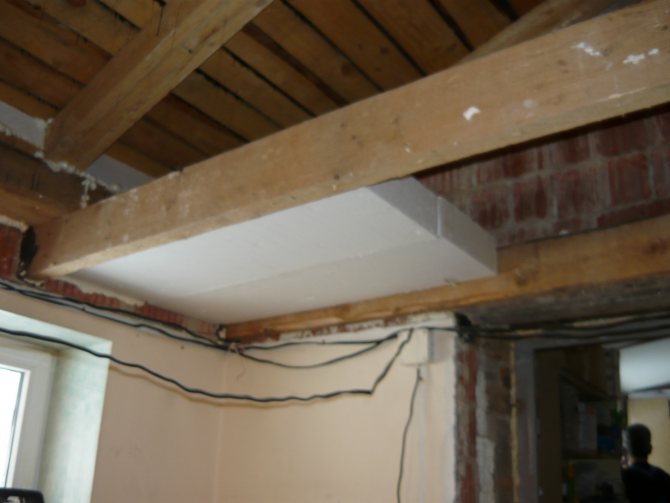
Picture. Warming by the frame method.
Main disadvantages
Flammability. When answering the question whether it is possible to insulate a wooden house with polystyrene foam, the most important argument against is that it, like wood, burns well.
Releases dangerous toxins on fire. Therefore, choosing this method of insulation, it is imperative to carry out fire-retardant processing of wooden structures, choose fire-safe facing materials, and comply with fire safety requirements.
At high temperatures (over 70 degrees), polystyrene loses its structural properties, therefore it is better to use it for external insulation, away from heating radiators and other heating devices.
The disadvantages of this type of insulation include insufficiently high vapor permeability, which can lead to dampness and decay of logs. This applies to damp rooms (saunas where the use of expanded polystyrene is not recommended). In other cases, the problem is solved by organizing ventilation.
It is worth remembering that polystyrene is afraid of chemicals such as gasoline, acetone, etc., and therefore it is necessary to insulate garages, sheds in which paint is stored with them with all the necessary precautions.
Insulation and fastening methods
From the point of view of science, insulation of the ceiling with foam from the outside is the most correct and effective way of thermal insulation.
If there is such a possibility, it is the external installation type that is used. But in apartment buildings, where internal insulation is the only possible option, this method is used. Its advantage is also that it provides good sound insulation at the same time.
Sheets of material can be secured in two ways:
- special adhesives; special umbrella nails.
From the attic side, there is no need for glue fixing. The quality of fixing is especially important for internal insulation. The glue is not applied to the entire surface of the foam, you can only cover it around the perimeter and the center will be enough. When using adhesive mixtures on water, the thickness of the adhesive layer is also added to the thickness of the foam.
Important! Since the foam is susceptible to destruction by solvents, when you first type of fastening, you need to inquire about the composition of the mixtures. They should not contain formaldehyde, acetone, alcohol, harmful resins.
Foam boards do not have sufficient moisture resistance, therefore, when laying external insulation, additional layers are required:
- from the outside it is a waterproofing layer; from the inside (from the side of the room) - a vapor barrier layer.
How to insulate the ceiling with foam outside:
- Surface preparation: removing dust, debris, leveling. Laying a vapor barrier - it is fixed with a stapler. For installation using a lag, lags are mounted, for a non-lagged installation method, pouring is done using wire reinforcement. Laying foam. Installation of a waterproofing layer - it must be installed with the approach to the walls. Laying the floor and trimming the waterproofing film along the edges. The finishing floor on top of the screed is laid only in the case of a residential attic, otherwise the screed is sufficient.
Important! With external insulation, with already existing logs, foam plates are easy to lay - you just need to choose their correct sizes.
The foam is cut in such a way that it fits tightly between the beams, and the gaps between the beams and the insulation must be blown out with polyurethane foam.

Insulation with beams should form a common plane. If the thickness of the beams is not enough, it is sharpened with wooden planks. A small gap is left between the insulation and the logs to ensure ventilation.
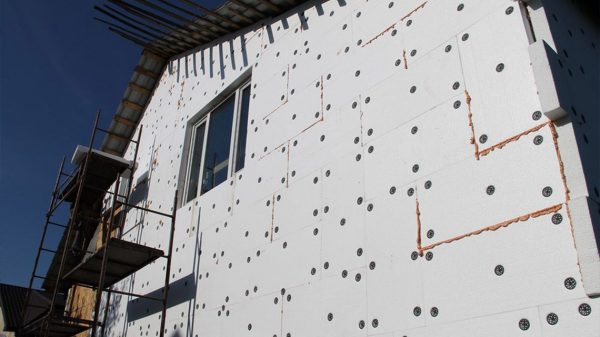
Fastening foam to brick and concrete walls
When insulating such walls, as a rule, a wooden crate is made, on which polystyrene is attached. However, this requires additional costs, so other methods can be applied.
Fixing the boards with glue
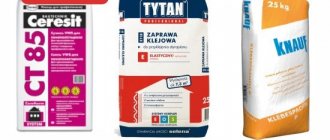
Having chosen this option, you should take a responsible approach to the selection of an adhesive composition, since some components can violate the integrity of the foam. In addition, not any glue is capable of bonding insulation boards to brick or concrete.
Foam bonding is carried out as follows:
- An adhesive solution is prepared in accordance with the attached instructions.
- Brick or concrete walls are pre-leveled and cleaned of dirt.
- The adhesive is applied to the foam boards in such a way that there are uncovered areas for air to escape.
- The insulation is firmly applied to the wall and held until the glue seizes.
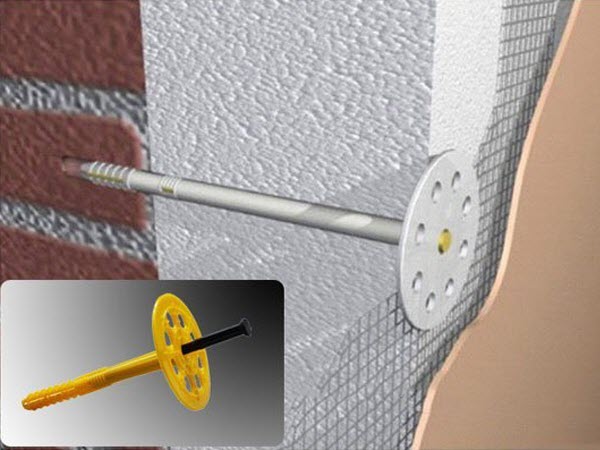
Fastening with umbrellas
For the attachment points on the plates, samples are made using a drill and a nozzle corresponding to the diameter of the head of the plastic fungus. Fastening is carried out in at least five points: in the middle and at the corners. In order to improve thermal insulation, the joints are treated with sealants.
Fasten the foam on the wall in rows, starting from the bottom. Small gaps should be left between the slabs, taking into account seasonal deformation from changes in ambient temperatures.
Gluing foam with "liquid nails"
Feature of "liquid nails" is increased moisture resistance and heat resistance. The adhesive should be applied only at a few points, it hardens in literally half an hour.
It should be borne in mind that "liquid nails" are a toxic compound, which must be handled with care and only work with special protective gloves.
Fixing the foam to the adhesive foam
With excellent adhesion to brick or concrete surfaces, the foam is relatively inexpensive and easy to use. The walls do not need to be primed before applying the foam - you just need to remove dirt and moisten.
The adhesive is applied to both concrete and foam. A short exposure is made, after which the plates are installed in a checkerboard pattern.
Technology of internal insulation of the ceiling with foam
A significant disadvantage of internal thermal insulation for a city apartment is that foam plates and finishing take precious centimeters away. Calculation of the final ceiling height requires the correct choice of foam thickness and mounting method.
When using a material with a thickness of 5 cm of lathing for finishing with clapboard, for example, it leaves in general about 8-10 cm of the height of the room. If suspended models of plasterboard ceilings are used, even more height is hidden.
How to insulate the ceiling with foam from the inside:
Surface preparation: cleaning of finishes and dust. Check the surface with a spirit level.
With noticeable differences, the surface is putty. For very large irregularities, plastering and grouting are required. If there are irregularities less than 0.5 cm, it is enough just to seal them and then sand them with sandpaper. Treatment of the surface with an antiseptic primer. Dry the surface. Foam plates are specially roughened using scrapers, sandpaper, a special knife.
A layer of adhesive solution is applied evenly over the entire surface of the sheet. Begin to install the sheets from the corner, pressing them to the surface and holding them for 1-2 minutes. Laying is done specifically with the displacement of each subsequent row by half-plates. After gluing and drying, holes are drilled in the center and corners of the sheets, dowels-umbrellas are inserted into them and hammered with metal pins. aluminum profile, then laying foam plastic and laying a vapor barrier. Installation of a clean ceiling.
When insulating from the inside, waterproofing is not required. If the final ceiling is mounted on a crate, these are plastic panels, plasterboard ceilings, lining, no additional fixing of polystyrene is required.
Important! Special polymer types of adhesives are not cheap, so you can save money by using a dry adhesive mixture mixed with water. You need to close according to the instructions, stir again after 5-7 minutes, after cooking it should be used within one hour.
In rooms with a high air temperature, in addition, foil and foamed foil insulation in rolls can be laid on foam plastic, while the finishing ceiling is made only on the frame.
Internal lining with foam
It is quite possible to fix the plates in the room on your own.
To securely fix the foam, work should be done according to the following scheme:
- Clean the walls from peeling paint and various contaminants, level them and repair cracks if necessary.
- Remove finishing elements of doors and windows, which are subsequently replaced.
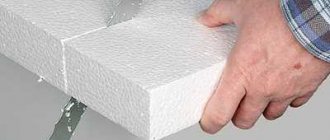
- Cut the foam into slabs of the desired size using a special cutter or a simple hacksaw.
- Purchase glue foam in cans or make a solution from a suitable dry mixture.
- Before fixing the board, apply adhesive to its edges, center and
- Apply adhesive in the center, along the edges and on the end surface of the board to be glued.
- Fix the styrofoam to the wall. The plates can be fastened either in rows with a shift along the perimeter of the room, or with a pyramid - first, the first row is attached along the entire perimeter, then corners are made in the form of a pyramid.
- Glue squeezed out of the joints between the boards should be removed with a spatula.
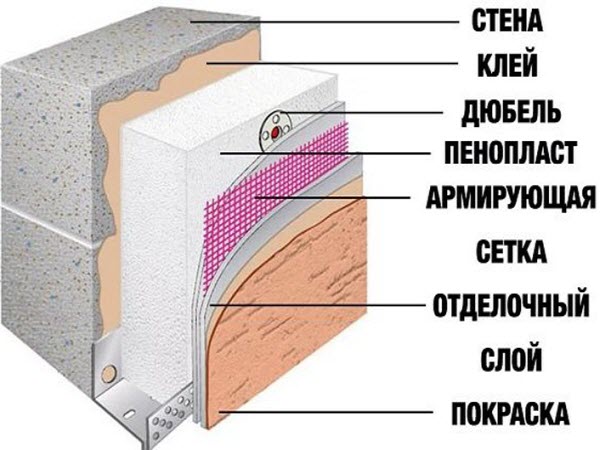
- At the final stage - close the insulation with a mounting mesh and plaster.
How to choose Styrofoam
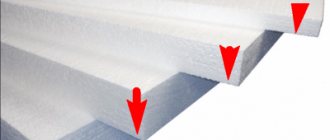
The thickness of the foam for ceiling insulation depends on the technology chosen. On the market, the thickness of the slabs varies from 20 to 100 mm:
- thickness of 100 mm is used for non-insulated attic spaces and roofs; thickness of 50 mm is used for both internal and external insulation of ceilings; thickness of 20-30 mm is used if there is external insulation of the roof and ceiling.
For insulation of the ceiling with foam, what thickness should it be? For external thermal insulation of ceilings, a thickness of 10 cm is optimal, for internal insulation - 4-5 cm.If an attic, which is used as an attic, is insulated, foam plastic with a thickness of no more than 5 cm is taken.
The most common sizes of slabs produced: 0.5 * 1 m, 2 * 1 m, 1 * 1 m. Styrofoam is well cut, and you can take any size, but it is more convenient and economical to use:
- for small rooms, apartments, balconies and loggias - option 0.5 * 1 m; for private houses - dimensions 1 * 1 m; for very large ceilings - 2 * 1 m.
Foam density characteristics for optimal selection:
- for external insulation - 25 kg / m3; for insulation of basement floors - 35 kg / m3; for internal insulation of residential premises, external insulation of non-capital and warehouse premises - 15 kg / m3.
For styling with your own hands, in addition to foam, you will need:
- dowels-umbrellas; glue mixture; perforator; drills; mixer and spatulas for glue; building level.
The amount of material is calculated based on the ceiling area and 2-4% for waste.
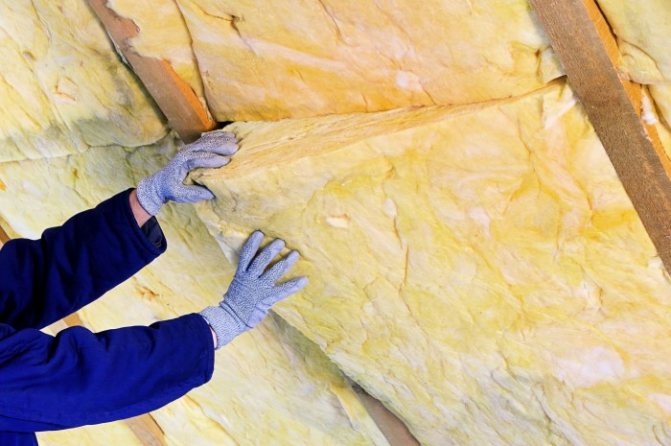
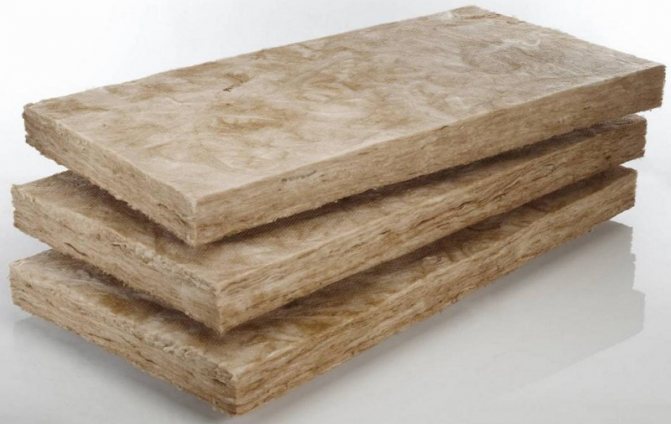
Mineral wool
A popular method of insulating a wooden ceiling is also using mineral wool. In terms of its thermal insulation characteristics, this material is superior to foam. The installation process is relatively straightforward.
Vapor barrier layer
A vapor barrier is laid on the outer surface of the ceiling, freed from the coating, free of debris and foreign objects. As with sawdust, a thick plastic wrap will do.
Install it with an overlap of about 10 cm. The seams are glued with tape.
Insulation installation
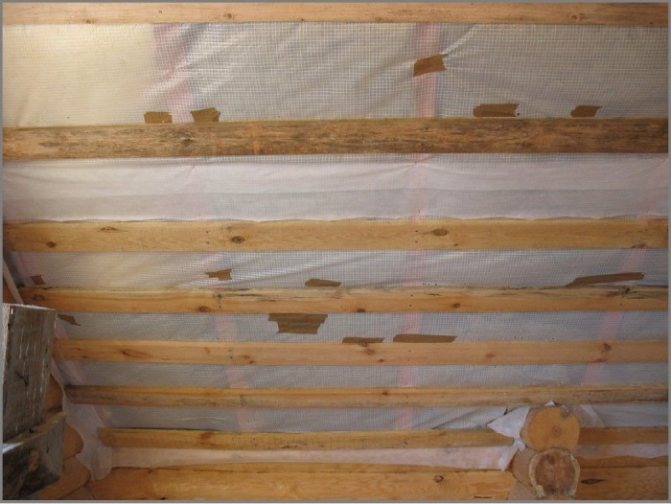
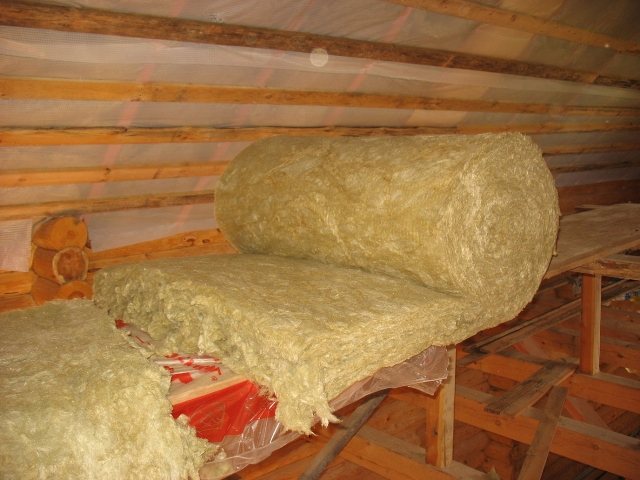
Mineral wool is produced in slabs and in rolls. When using roll material, the cotton wool is unwound along the beams.
The second layer of insulation is laid in the opposite direction, covering the beams and joint areas.
For additional fixation of the insulation strips, you can use nails, the caps of which should be slightly “sunk” into the top layer of the material.
Waterproofing
One of the few disadvantages of mineral wool, but quite significant, is its hygroscopicity. It is very easily saturated with moisture, which has an extremely negative effect on its thermal insulation properties. Therefore, the insulation layer must have reliable external waterproofing.
Lay it on top of the mineral wool with an overlap with gluing the seams.
Finishing layer
If the attic is not in use, then a cement-sand screed can be made over the insulation structure. When arranging residential attics, floorboards or laminate are installed.
Insulating the ceiling of a private house is a relatively simple technological process. These works do not require any special skills. If desired and knowledge of the main technological points, everyone is able to cope with this task on their own.
Reasons for the formation of condensation
If, after insulation with foam, it drips from the ceiling, the thermal insulation is made of poor quality: the low surface temperature collides with steam and warm air rising upward, resulting in the formation of moisture droplets that settle on the coating.
Drops appear when steam cannot escape, and the higher the humidity in the room, the lower the dew point temperature. The formation of condensation leads to the appearance of mold and mildew, deterioration of thermal insulation.
The most common causes of condensation can be:
- ill-conceived ventilation design; lack of an insulating layer or its incomplete protection; improper arrangement of insulating layers; poor-quality insulation, which leads to freezing of the ceiling covering; with temperature changes resulting from different insulation in different areas.
Especially often, temperature drops can occur:
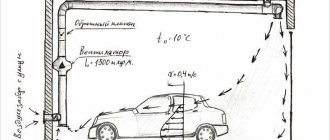
- in cellars on the ceiling; in freestanding garages and sheds; on balconies and loggias; in poorly ventilated rooms; when insulating roofs with a large angle of inclination, where waterproofing or insulation can roll down, forming cold areas.
If there is condensation, what can be done
If there are already flaws in the thermal insulation, the process of eliminating them is quite laborious:
- insulate the finished coating from the cold floor: insulate with mineral wool, cover with expanded clay, apply a layer of brick chips, lay down foam insulation; the condition of the insulation should be checked: disassemble the insulation cake and carefully investigate whether there are any breaks and damages, as well as whether there is water absorption; if moisture penetrated to the inner layers of the finish, you need to free the surface up to the main ceiling (concrete surface), dry the ceiling using a construction hair dryer, then replace the insulation.
In order for the condensate to flow down, it is required to create an inclined surface on the horizontal surface of the ceiling. Depending on the location of the slope, a drain for water is adjusted with an outlet to the outside, under which a container is placed to collect water. Near single buildings, grooves are made through which water enters the soil.
For the device of an inclined condensate drain on the ceiling, you will need: polyethylene film material equal in size to the ceiling area, sheets of galvanized iron, plastic pipes.
Useful video
Next, in the video, let's see an example of warming the ceiling on the balcony and loggia with foam plastic with our own hands:
Thermal insulation of the ceiling ensures a comfortable temperature in the home and significant savings in heating costs. Considering that the cost of polystyrene is low, and the technology of its installation is simple, this is one of the best options.
(3estimates, average: 3,67of 5) Loading ...
In the article we will discuss the insulation of the ceiling with foam with our own hands: how is it done, what are the advantages and disadvantages of choosing this particular material for thermal insulation, and are there any alternatives. Let's figure out how you can use foam to insulate ceilings. How are ceilings insulated? If we discard too exotic options , there will remain two main categories of materials for insulating ceilings from the inside: Mineral wool in all its forms. An inorganic fiber that does not emit any harmful substances and is very inexpensive. The main disadvantage of mineral wool is hygroscopicity.
Moreover, at high humidity, it significantly reduces its heat-insulating qualities.On the contrary, it does not require thorough hydro and vapor barrier; however, it is combustible and relatively expensive. In addition, he is often accused of emitting harmful substances into the atmosphere.
The situation is controversial and unprovable, so let's leave this point without comment. Properties of foam as insulation Actually, we have already outlined them in part. Let's dwell on the features of the material in a little more detail. Advantages Please note: in a wooden house, vapor barrier can be dispensed with only when the foam plates are laid without gaps: the seams between them are foamed or glued with adhesive tape. Moisture is harmful to both beams and rafters.
However, the sealing of the seams is also desirable from the point of view of minimal heat loss. Here, as you can see, the vapor barrier is made. And this is quite justified: it will protect the wood of the beams from moisture. Foam does not cake over time, unlike glass wool. It fully retains its thermal insulation qualities throughout the entire period of operation. With the same thickness of the insulation layer, foam is more effective than any mineral wool. Foam is more expensive than mineral wool.
With the same thickness, it is much more expensive. Adjusting it to the size of the finished sheathing is somewhat more difficult. However, if the insulation of the ceiling from the inside in a private house is performed from scratch, it is not a problem to make a crate in the width of the sheet. About fire safety it has already been said: foam is combustible. Disadvantages Nevertheless, when asked whether it is possible to insulate the ceiling in a private house with foam, the answer will definitely be positive. Can.
Moreover: if the cost of insulation does not bother, it will be the best choice. Insulation with foam is effective and durable. Methods of insulation How to insulate the ceiling with foam? Let's separately analyze several cases with different ceilings (see How to insulate a ceiling on a balcony with your own hands). Scenario 1 Given: a private house with a cold attic.
The ceiling is hemmed with plywood or OSB from below to the wooden beams. We put foam plates on top of the space between the beams with a minimum gap. Of course, after clearing this space of debris. The foam is placed in the space between the beams. Carefully foaming the seams between the slabs and beams. There should be no gaps.
Otherwise, moisture will condense on the roof and cause the rafters to rot; in addition, gaps will indicate heat leakage. Do not forget: warm air tends upwards. If you plan to use an attic, we cover the ceiling with boards or OSB along the beams. Please note: if OSB is taken with a thickness of 15-18 millimeters, a distance between the lags of 40 centimeters is recommended. If the beams are less often, additional lathing will be needed. Scenario 2 Given: unplastered reinforced concrete floor without significant irregularities and differences in height.
How will the insulation of the ceiling look like foam (extruded polystyrene foam) or foam in this case? Let's start with the main thing. The ideal option in this case is to insulate the ceiling from above, not from below. Why? The dew point (condensation) in the case of insulation from the inside will be on the border between foam and concrete. If the tightness of the foam layer is broken, the concrete will begin to dampen and collapse (see.
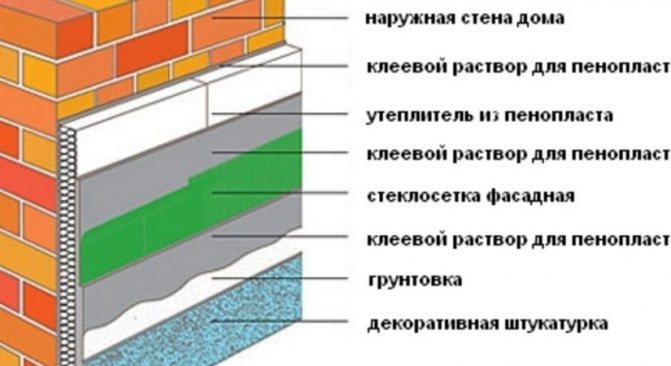
Foam ceiling slabs - do-it-yourself professional ceiling decoration) Reinforced concrete floors are an excellent heat accumulator. After warming up, the walls and ceiling can provide a comfortable temperature in the house for several days, even when the heating is not turned on and it is cold outside. Having insulated from the inside, we lose this advantage. It is better to insulate a reinforced concrete floor from above. What to do if, for some reason, insulation from the outside is impossible? Foam plates are glued end-to-end directly to the concrete.
The choice of glue is great: a variety of liquid nails, universal synthetic adhesives (Titanium and its analogues), acrylic putty. If the ceiling is uneven and it is difficult to glue the foam firmly, special fasteners are used. The seams are carefully sealed. For this, polyurethane foam, and the same acrylic putty can be used. Outside, a reinforcing fiberglass mesh is glued. It will additionally bind the foam sheets and become the basis for applying decorative plaster.
The mesh strips are glued with a ten centimeter overlap and a layer of any decorative plaster is applied. It can be both smooth and structural - everything is in your hands. Scenario 3 What will it look like to insulate the ceiling with foam from the inside in a private house if there are reinforced concrete slabs overhead with significant differences in height or distortions? Moreover, insulation outside, again, for some reason, is impossible (for example, there is an observation deck overhead)? We use a crate with a decorative ceiling lining with PVC wall panels for insulation. We mark and attach a galvanized profile crate for drywall to the ceiling.
The UD profile is attached in level to the wall, the CD profile is located perpendicular to the future panels at a distance equal to the width of the foam sheet - 50 centimeters. A step between the suspensions of 60-70 centimeters is quite enough: the ceiling will be light. The framing can also be made of wood. But then a layer of vapor barrier is desirable in order to protect the tree from moisture. We put a spacer between the profiles of the foam plate and seal all the seams with polyurethane foam. We sew with panels. The method of their installation has been described many times and does not present any problems. If the unevenness of the walls left noticeable gaps between the ceiling and the edges of the panels, we cover them with a ceiling plinth.
The ceiling is ready. PVC panels allow you to make the ceiling very neat with minimal costs. Conclusion Of course, we have described not all possible ways to insulate the ceiling with foam. However, now you understand the general principle of how thermal insulation is performed with this material, and you will be able to think through the technical details yourself. Good luck in the repair!
A very large percentage of losses occur through the ceiling of the upper floor in a non-insulated attic.
This is due to the fact that the heated air always moves upward. One of the most effective ways to prevent heat loss is to insulate the ceiling with foam. When used in a private house, insulation has many advantages.


Styrofoam - convenient, fast, safe?
Except for exotic insulation materials like cork, foam and mineral wool remain the only real competitors in the field of thermal insulation. Many people consider foam to be cheaper, which means a lower quality option, but in fact, foam plates of the same thickness as mineral wool plates will cost a little more. At the same time, the foam ceilings, which are shown in the photo, will not only be warmer, but also more durable - cotton wool cakes over time, losing its qualities.
Polyfoam is also devoid of the main disadvantage of the mineral fiber, of which cotton mats or rolls are composed - polystyrene, the granules of which are the main component of foam plates, is absolutely non-hygroscopic. Simply put, he does not care about humidity - the material practically does not absorb moisture, which means that it does not change its properties, as it happens with wet mineral wool. Also, thanks to this quality, in some cases, you can save on hydro and vapor barrier.
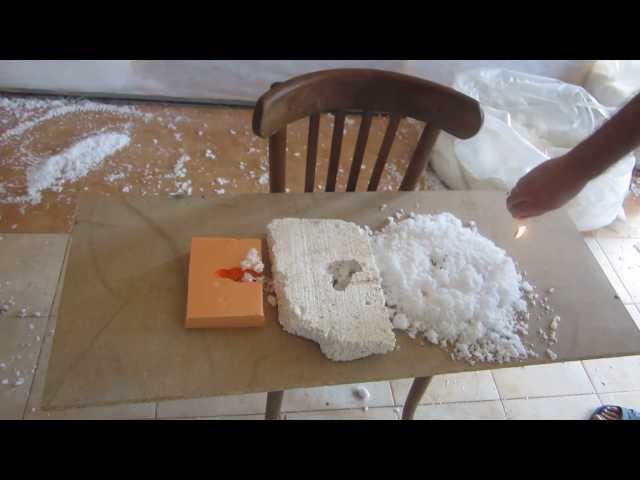
Minvata outperforms expanded polystyrene in only one thing - it does not burn.Polyfoam, on the contrary, is combustible, although, in fairness, we note that for ignition it needs a temperature two times higher than that of wood, and during combustion it releases several times less thermal energy. We will leave the issue of the environmental safety of polystyrene and the release of harmful substances for those who like to debate - around us in everyday life there is a huge amount of substances and materials that are much more dangerous than compressed polystyrene granules.
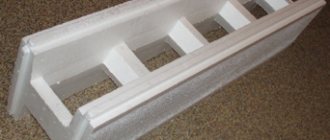
There are also subjective differences that, in principle, do not play a big role in the choice of material. In this case, it is the convenience of DIY installation. Expanded polystyrene plates are absolutely the same in all parameters, it is convenient to cut them and give them any shape. There are no difficulties in how to fix the foam to the ceiling - the plates are perfectly attached to almost any surface using all kinds of dowels and adhesives. The photos in this article demonstrate the ease of installation.
Especially the convenience of work is felt when the ceiling is being finished - mineral wool has to be fixed with additional stretch marks, stiffening ribs are made. Polyfoam, in the case of adhesives, is enough to press it to the surface and hold for a minute so that the composition grabs.
Find out how to make a stretch ceiling with your own hands.
Advantages and disadvantages of foam
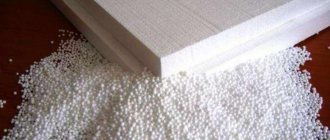
The material is an accumulation of styrene balls with air inside.
Air and inert gases are the best insulation materials in the world. The more air in the material, the better its thermal insulation properties. The advantages of polystyrene (expanded polystyrene) include:
Table with the characteristics of foam
Low thermal conductivity. The main characteristic of a heat insulator is its ability to conduct heat. The lower it is, the warmer it will be in the room. The thermal conductivity of foam is about the same as that of mineral wool or extruded polystyrene foam. Low cost. Carrying out repairs or construction is always costly.
Polyfoam is an effective material that does not require large financial investments. Low weight. The mass of expanded polystyrene allows you to use it for insulating ceilings from the inside without any problems. The material adheres well to a horizontal surface. The smaller the mass of the insulation layer, the easier it is to fix it and the less likely it will fall off during operation.
The light weight for events in a private house also reduces the cost of material delivery. Simplicity of installation. The characteristics of the heat insulator allow even a non-professional to do the job. To insulate the ceiling with polystyrene, you do not need to make a lot of effort. Safety. When self-warming in a private house, it is important to ensure the safety of the manufacturer and residents in the future. The structure of the foam is such that even when destroyed, it crumbles into sufficiently large balls.
They cannot harm a person. This distinguishes polystyrene favorably. for example, from mineral wool, when using which it is necessary to use masks and gloves.
Dimensions of material for insulation
The positive qualities of the foam allowed it to firmly establish itself in the building materials market. But it has its own characteristics and limitations. Insulation with expanded polystyrene has the following disadvantages:
Styrene balls do not absorb water, so the foam has a rather low degree of water absorption.
The difficulty lies in the fact that water can get into the space between the balls. Under normal conditions this is not a problem, but if the ambient temperature drops, damage will occur. The bond between styrene balls is not very strong.
When water turns into ice, it expands, affecting individual particles of the material.With the simultaneous action of water and cold, the foam simply crumbles. Low fire safety. Polystyrene is not resistant to high temperatures.
Now manufacturers are introducing special additives into the composition that make polystyrene a low-combustible material, but the problem remains. Low strength. This drawback is important for floor insulation. For installation on the ceiling from the inside of the room, it is not necessary to use durable materials; weight becomes a more important factor here. Thermal insulation from the side of the attic with foam is also possible, but due to its strength, it is placed between the logs or under a strong reinforced cement screed. Unnatural origin. This is also more a feature than a disadvantage.
Insulation materials of natural origin, such as sawdust or expanded clay, have low efficiency. Another type of natural insulation is ecowool. The material is effective, expensive. The last two points are not serious drawbacks when insulating the ceiling in a private house, so we can say that the foam proved to be an excellent heat insulator with a score of 5: 2.
How to insulate the ceiling?
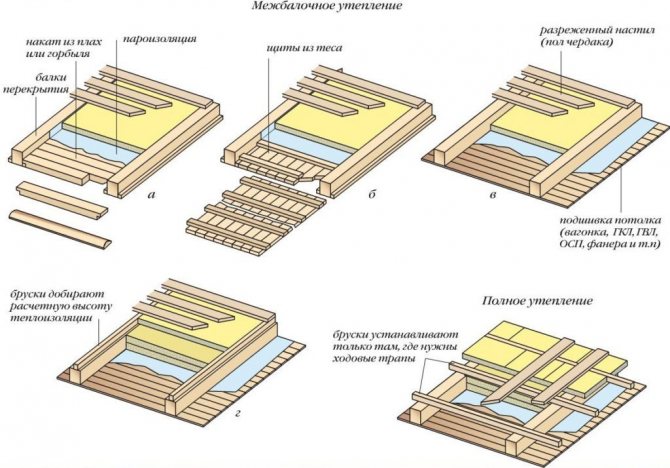
All materials that can be used to insulate the ceiling in a wooden house are divided into three groups:
- loose;
- soft;
- solid.
The first group is used only for external insulation. The other two are used in both methods. The most popular representatives of each of the groups, respectively, are:
- sawdust;
- mineral wool;
- Styrofoam.
Warming methods
When insulating in a private house, it is recommended to insulate the ceiling of the upper floor from the attic side
Do-it-yourself foam insulation of the ceiling can be carried out from the outside and from the inside. The cold air side option provides more efficiency and is scientifically correct. When insulating in a private house, it is best to insulate the ceiling of the upper floor from the attic side.
This method is difficult if insulation is carried out in an apartment building. In this case, insulation from the inside is practically the only possible option. Insulation in the apartment is carried out not only to protect it from the cold, but also from noisy neighbors.
If you insulate the ceiling with foam from the inside, you can significantly reduce the noise level and create favorable conditions for relaxation.
As mentioned earlier, the combination of water and polystyrene is undesirable, therefore, when laying, two additional layers are provided: from the cold air side - waterproofing, and from the inside of the room - vapor barrier.
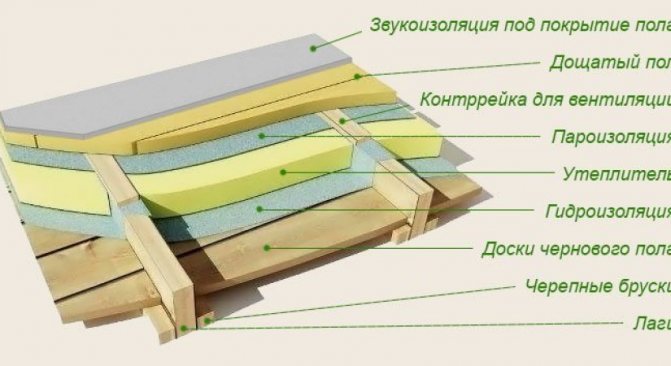
The procedure for carrying out work with insulation from the attic side:
- clearing the surface of debris, dust and dirt; if necessary, leveling; vapor barrier; laying logs (if needed); laying foam (it is necessary to provide a small gap between the insulation plates or between the insulation and the logs, the foam expands slightly after laying); waterproofing; filling the screed (for the method without logs) with laying of wire reinforcement with a diameter of 3-4 mm; clean floor.
Installation of the frame on the ceiling Fastening the sheets to the ceiling Vapor barrier of the insulated ceiling
The last point is an optional step. You can leave a cement screed as a floor covering in the attic.
Thermal insulation of the ceiling in a private house from the inside is performed in the following order:
- cleaning the ceiling; installation of the frame (wooden or aluminum profile, the stage is not necessary); fixing the foam sheets; vapor barrier; ceiling sheathing.


Styrofoam installation process
Before starting work on fixing polystyrene foam plates, you need to calculate the width that they will take away from the ceiling height. Here it is necessary to take into account the width of the sheets and the future lathing for the final finishing of the ceiling surface. On average, this figure is 10 centimeters; when installing a suspended structure, the value will be greater.
The first step is to prepare the surface:
- the old finishing coating is being dismantled.The building level is required to determine the height differences;
- if there are strong drops, the ceiling must be leveled with putty. If the ceiling is in an unacceptable condition, it is necessary to level it with plaster. At the end, you will need to wipe the dried composition;
- after the leveling layer has completely dried, it is necessary to treat the slab with a primer containing antiseptic components. Allow the ceiling to dry completely.

If it is decided to use the attic as a living space, then it is imperative to insulate the ceiling with foam
Installation of polystyrene foam boards is simple, there is no need to do preliminary waterproofing. The following algorithm is recommended:
- dilute the glue according to the instructions from the package, mix thoroughly. Let it stand for 5-10 minutes and mix well again. It is recommended to use the diluted composition within 60-90 minutes, then dilute with a new one;
- using sandpaper, it is necessary to wipe the foam surfaces so that they become rough;
- a thin layer of glue or small dots is applied to the sheet (see the paragraph "How is the foam attached to the ceiling?"). You need to start mounting from the corner of the room. After contact with the ceiling surface, it is required to press down firmly on the polystyrene foam board. Further installation is carried out in strips horizontally or vertically;
- at the end of the installation work, it is necessary to allow the glue to dry. This will take 12-24 hours. If the finishing will be done on the frame, it is not necessary to additionally fasten the sheets to the dowels.
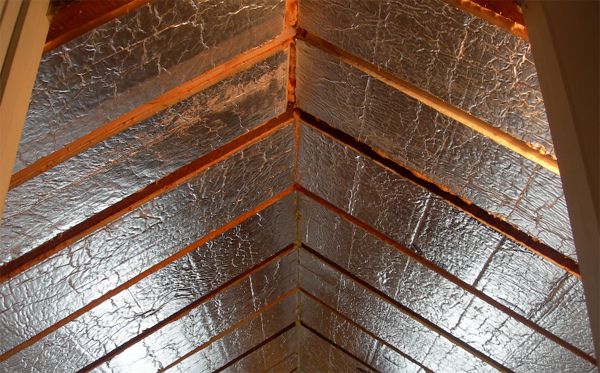
To improve insulation, you can close the foam with foil. In this case, the subsequent finishing of the ceiling surface should be carried out only on the frame.
In a private house, it is imperative to do ceiling insulation so that in the winter time the house has a good temperature
Some experts are adherents of the frame mounting of the insulation. With this option, before installing the foam, a frame is made of a metal profile or wooden bars. Modern realities show that this option makes no sense. The quality of insulation does not improve, but extra money is spent, which is undesirable with a limited budget.