Floor insulation in the conditions of the Russian winter is an important stage in the construction of private and apartment buildings.
And if earlier it was a luxury item, now, more often the choice of designers falls on the type of floor insulation, where the entire system can be regulated.
The tile, having good thermal conductivity, is ideal material under the heating system underfloor heating. Among the variety of types of insulation, it is worth highlighting electric.
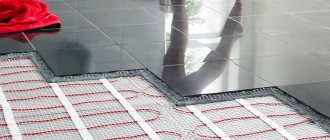
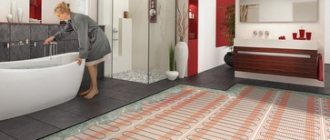
What electric underfloor heating? This is a type of floor heating, in which the floor is heated by a cable or film running under the covering. Such a floor receives power from the electrical system of the house.
Why is it better to choose an electric underfloor heating:
- Electric floor - the most "regulated"... The control system allows not only to increase or decrease the power, the temperature of the incoming heat, but also to turn off / turn on the heating in each room separately.
- Electric underfloor heating is durable.
- The heating rate is significantly higher in comparison with other types of warm floors, which means that no need to wait longuntil the room warms up.
- The ability to locate the break in the heating element cable using an indicator screwdriver without having to open the entire floor covering to find it.
- Safety during operation and in case of damage to elements. A residual current device is built into each system in case of an accident or minor damage to the system.
- The main criterion for choosing the installation of an electric warm floor under the tiles is the properties of the tiles themselves. With excellent heat dissipation, the tiles are practically 100% heat transfero obtained from the heating system.
What kind of insulation to choose?
- Glass wool and its modifications.
Nowadays, you can buy the following varieties of this material: glass wool, mineral wool, basalt, stone, shpak. All these heaters have a cotton wool structure and differ in the source material from which they are made. Their production method is practically the same: melting. For example, the components of mineral wool are molten glass, rocks and spats.
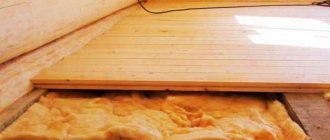
The thermal insulation characteristics of different types of this material are also identical. Each of them can be rolled and in the form of mats of different thicknesses. The most famous and popular brands: Isover, Rockwool, PAROS, URSA. They can insulate the floor if there is no high humidity in the room or basement. Any of these materials are hygroscopic and deteriorate when wet.
- Penofol.
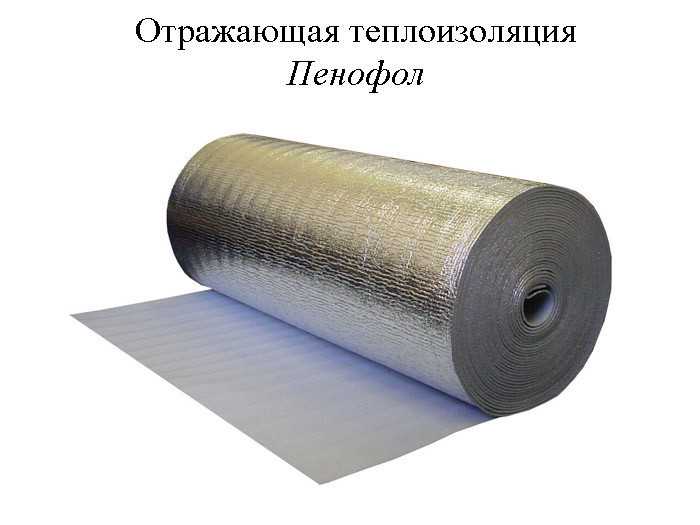

Penofol is a roll material, usually foiled on one of its sides, or on both sides at once.
This is a new generation of insulation. It is a roll material, as a rule, foil on one of its sides, or on both sides at once. This heat-reflecting coating distinguishes it from other insulators and is therefore a unique product that prevents heat leakage. Penofol can have a self-adhesive layer, which only increases the reliability of the barrier for cold air access. It is produced in rolls and comes in different thicknesses.
- Styrofoam.
It is a universal insulation, the most popular and used everywhere. Sheets of this material can have a thickness of 2, 2.5, 3, 5 and 10 cm. Standard sizes: 100x100 cm and 100x200 cm.
Polyfoam can be of different densities. Moreover, the higher it is, the higher the thermal insulation properties of this material. The insulation of the floor is made of solid and high quality, with a high degree of density.This is the most preferable option for laying under a tile.
Types of insulation and the necessary tools
The advantages of an insulated floor are quite obvious. First of all, the legs will always be warm, which will not lead to a runny nose. The even distribution of warm air throughout the room will avoid drafts in it. You can approach the process of floor heating in different ways.
These include:
- electric floor heating;
- heating with water;
- insulation with insulating materials (mineral wool, glass, basalt fiber, etc.).
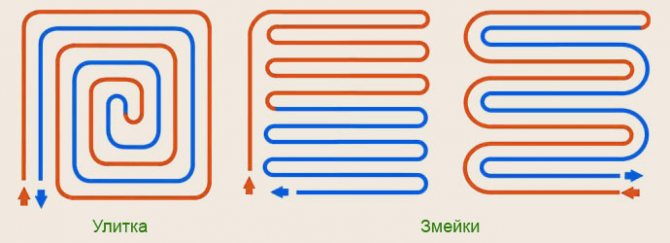

Scheme of methods for laying pipes for underfloor heating.
In order to tackle the process of repairing floors, you need to prepare for this business. To do this, you will need the following tools and materials:
- a puncher, which will be needed to remove old tiles and prepare the coating;
- a mixer or stirrer with a nozzle for a perforator cartridge for preparing a solution on a screed;
- building level to determine the floor horizon;
- a voltmeter or tester, which will be needed to check electrical connections;
- polypropylene pipe with scissors, a soldering iron and the necessary fittings for the preparation of water heating;
- reinforcing mesh for screed preparation.
Insulation of the concrete floor under the tiles

Tiles can only be laid on cement-sand or other masonry mortar.
Tiles can only be laid on cement-sand or other masonry mortar. Therefore, the floor in such a room will be concrete. He, like ceramic tiles, does not retain heat well, therefore it needs high-quality insulation. The technology of work in houses with and without a basement has slight differences. Let's take a look at each of these methods.
- Insulation of a concrete floor in houses with a basement.
The problem of a cold floor is more relevant for residents of the first floors. The best option would be to insulate directly from the basement side, sheathing the concrete floor with foam sheets. But in practice, this method is rarely used. Therefore, the insulation works are carried out in the apartments by the tenants themselves. Sequence of work:
- Dismantling the top, usually a wooden covering.
- We clean the surface of the concrete slab from debris and dirt.
- Using the hydro level, we make markings on the walls of the room, which should correspond to the height of the future floor, taking into account the facing. The lines must be strictly horizontal.
- We lay the waterproofing material. Roofing material is most often used, but you can use a more modern method: treat the surface with any of the bituminous mastics.
- We lay insulation between the lags. If the climate of the region of residence is warm, you can simply fill in a layer of expanded clay.
- We lay a vapor barrier material on top of it (if foam is selected, then one is not required).
- Next, we lay the reinforcing mesh with a bar section of at least 5 mm.
- We prepare a concrete solution in a ratio of 1: 3, where 1 part is cement and 3 is sand.
- We fill the floor with concrete layer by layer, focusing on the marking lines. Each subsequent one - only after the previous one has hardened. The last layer is leveling, so the concrete should be more fluid.
- We make laying of tiles or porcelain stoneware.
- Thermal insulation of the floor under the tiles in houses without a basement.
Often these buildings stand on piles and their lower floors are located close to the ground. The technology of their insulation differs in that a large thickness of insulation is required. All work is carried out indoors. Their sequence is similar to that described above.
The technology of laying an electric underfloor heating under ceramic tiles
Preparatory work:
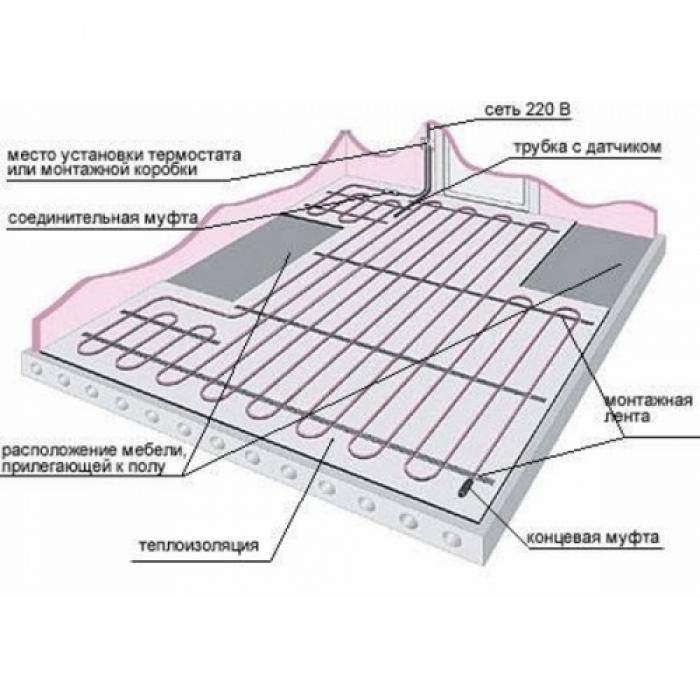
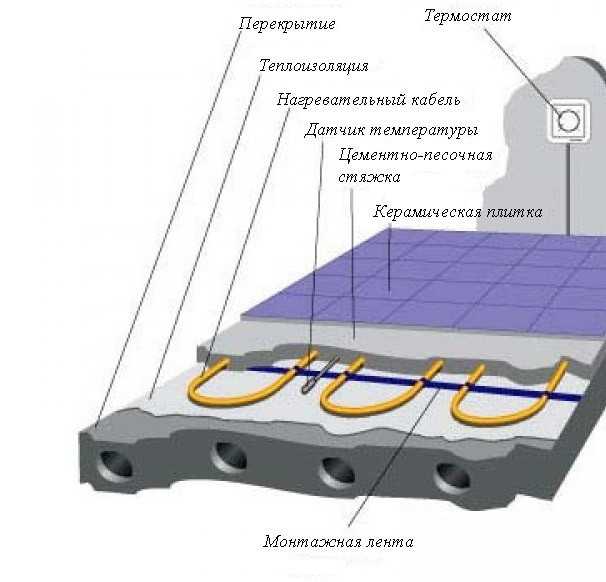
- Designing a work flow diagram for each room.The location of the furniture, the future thermostat, is taken into account, the location of the grooves in the wall and at the base of the floor for connecting wires, the location of the temperature sensor is outlined. The step of laying the wires is taken into account.
- Cleaning the floor from unnecessary objects, small debris, if necessary - removing the old floor covering.
- Leveling the surface, priming the floor, necessary for a better bond of the base with the tile adhesive.
Advice: do not lay the cable for underfloor heating close to the wall. The recommended indent is 10 cm.
It is necessary to take into account the arrangement of furniture without legs when designing the circuit and not assign cable laying to these places, since heat transfer will be difficult, which ultimately will cause system malfunction.
When installing underfloor heating only in one in a particular room, and not in the whole house, power needs to be taken into account already existing electrical wiring. It may be weaker and will need to be replaced.
Preparation of the base... The laying of the heat-insulating substrate is carried out with the cable method of floor insulation. They are not used for thermomats. Thermal insulation is foil, cork, polyurethane, etc.
Important: it is impossible to lay the cable without laying the thermal insulation, as it prevents the transfer of heat into the depths of the ceilings and retains it on the floor covering. This design makes the warm floor truly functional and does not allow energy to be wasted.
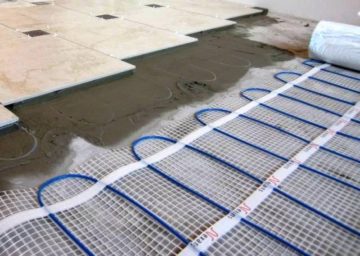
Thermomats do not require an insulating layer, since the cable is already laid and fixed on a special surface. Next, the metal mesh is laid on the heat-insulating layer.
Installation of electrical equipment:
- Installation of the thermostat into the wall, next to the sockets (minimum height - 30 cm, maximum recommended 60 cm from the floor surface).
- Installation of a thermal sensor in a corrugated pipe up to 20 mm wide, for free movement of the sensor and in the event of a malfunction - the possibility of easy replacement. The sensor is installed in the floor (in a heat-insulating layer).
- The temperature sensor should not be located close to the heating cable, nor should they intersect.
Underfloor heating installation:
- Laying the underfloor heating cable with a step, according to the layout scheme agreed at the beginning and taking into account the recommendations of the cable manufacturer. The cable is secured with mounting tape. Thermomats are convenient because the cable is fixed on their web already with the required pitch. Mandatory cable resistance check with a multimeter. The difference in the resistance value should not differ from the passport by more than 10%. Checking should be done before and after cable installation.
- Lead the ends of the conductor to the terminals of the installed thermostat.
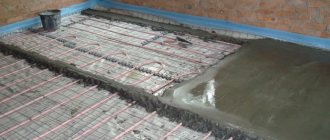
- Filling the screed.
Important: before the final pouring of the underfloor heating screed, it is necessary to check the cable for short circuits and breaks. This can be done with an ohmmeter.
- Laying tiles. Connecting, checking underfloor heating.
- After the screed has set (2-3 days), you can start tiling the floor. The tile is set on tile adhesive.
- It is recommended to turn on the warm floor after 28 days (concrete hardening time) after complete installation.
Installation of the "warm floor" system as an option for floor insulation under the tiles
- We prepare the base. We remove the old coating and clean the space between the lags.
- If necessary, we level the flaws with a cement-sand mortar.
- We install waterproofing.
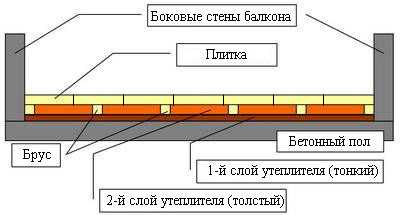
- We lay the insulation. The best option is polystyrene, penofol, polyurethane foam plates 3-5 cm thick. A special insulation for the "warm floor" system is also sold, it has recesses for pipes, which greatly facilitates the work.
- In order to avoid deformation of the insulation during the heating of pipes, it is recommended to leave a gap of at least 0.5 cm between the foam and the wall. The gaps between the sheets can be sealed with polyurethane foam.
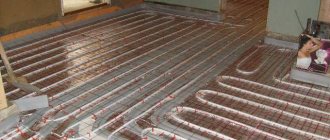
- We make pipe laying.The best option is to use metal-plastic or polypropylene, as they are durable, strong and have good flexibility. Their installation is possible in one of the following ways:
- spiral;

The distance between the pipes should be 30-40 cm.
- snake;
- a spiral with an offset center;
- double snake.
No matter how the pipes are laid, the distance between them should be 30-40 cm. We bring the supply and return ends to the collector cabinet. You can fasten pipes to insulation in the following ways:
- laying between "bosses";
- using U-shaped spring brackets;
- mounting aluminum plates;
- mounting on a special metal mesh with plastic clips for fastening pipes.
We connect the system to the water supply, set the necessary adjustments in the collector cabinet, fill the pipes with coolant, turn on the system.
Warm floor and its advantages
The device of a warm floor on a loggia covered with ceramic tiles is a good solution. The tile will be a wonderful decoration of the room for many years. And the heat under the tiles can be equipped with heating electrical elements or from pipes with water as a heat carrier. The main advantages of underfloor heating include:
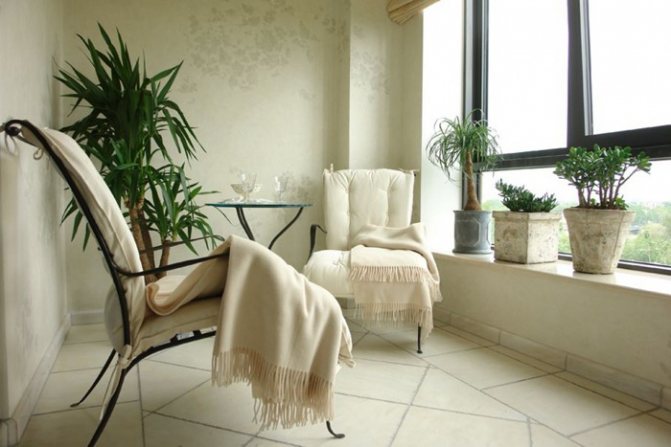

The tile on the balcony looks aesthetically pleasing, and especially good when it is warm

