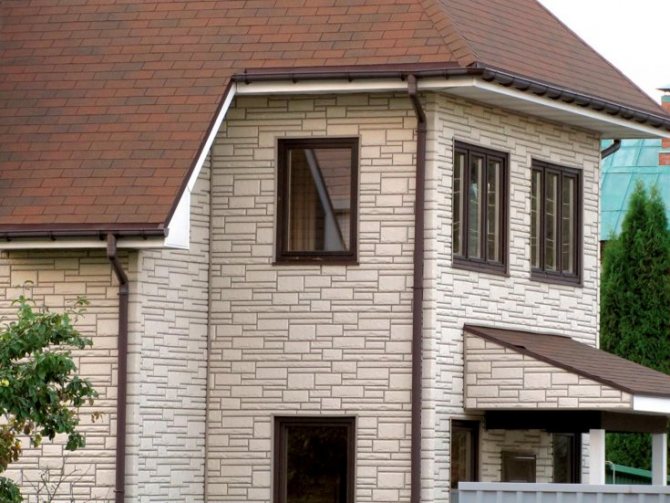
Siding principles
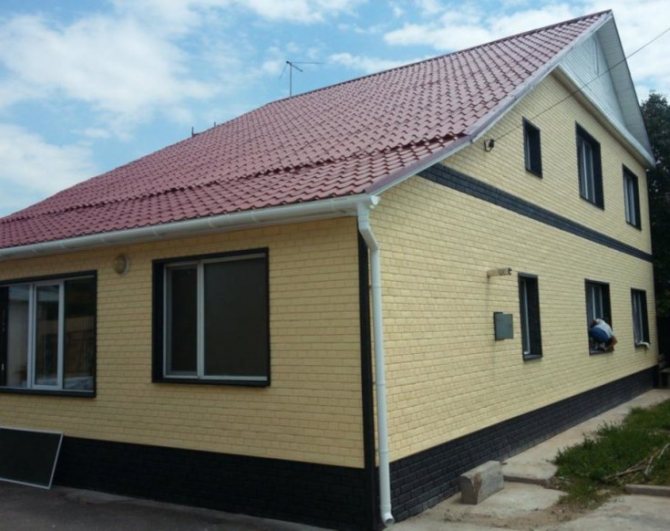
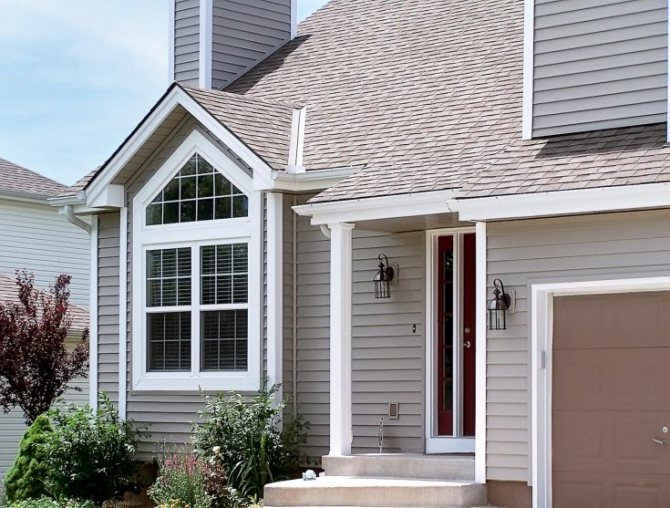
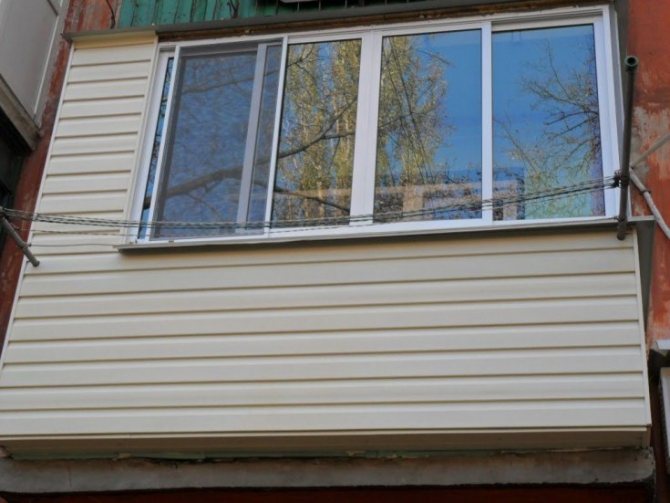
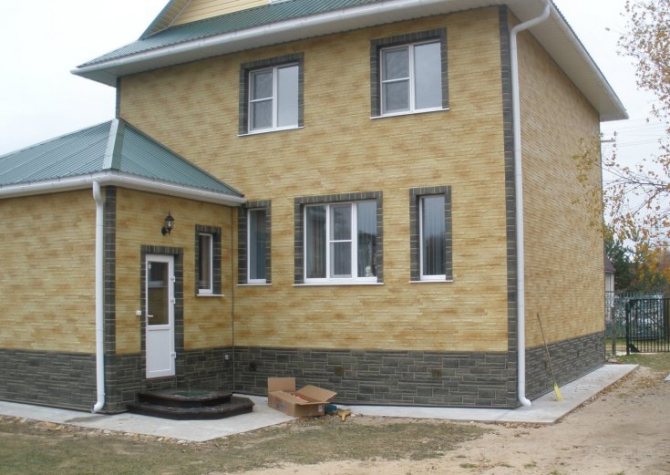
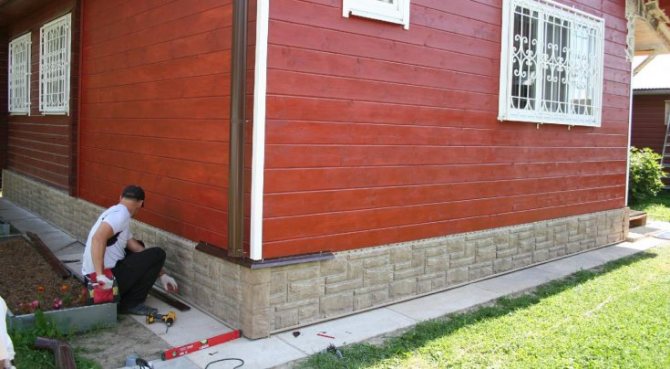
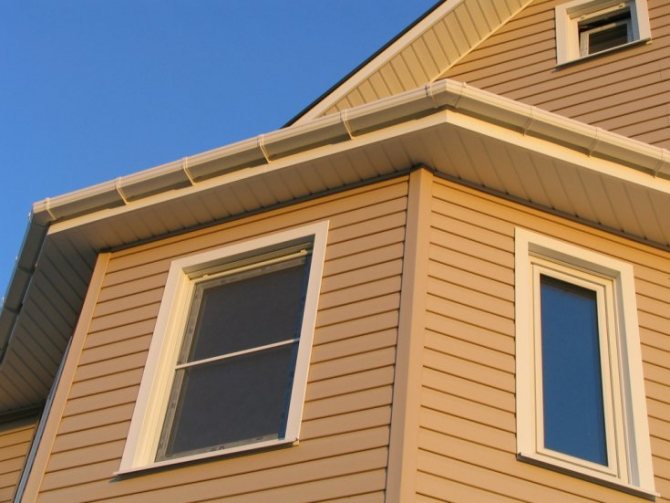
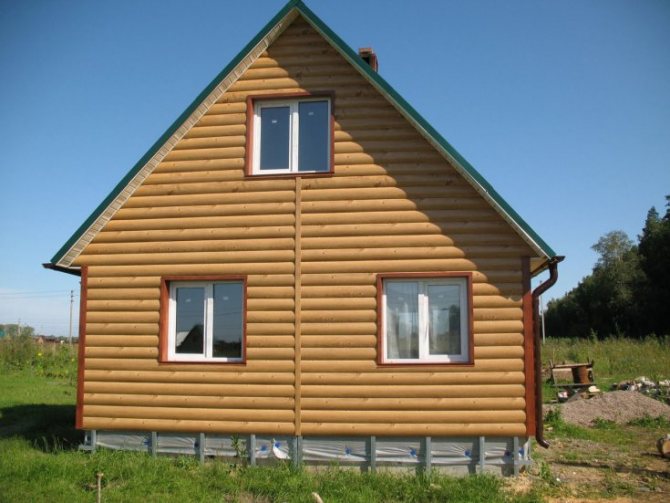
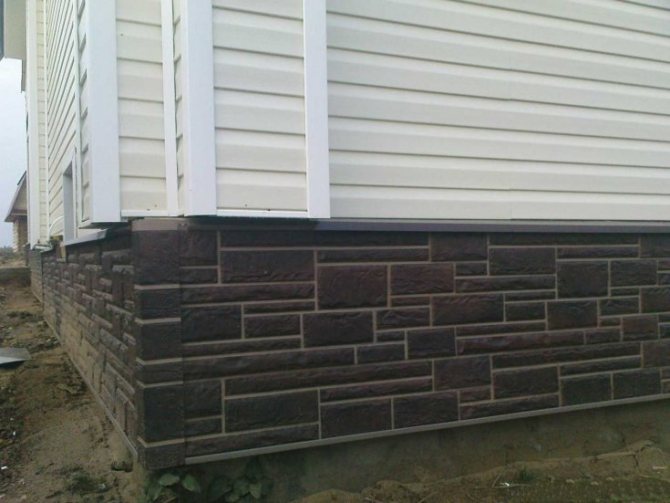
Siding is widely used for exterior cladding in construction. To transform the facades of houses, basement siding material is used. The shape and color of the panels changes in accordance with fashion trends.
The composition of the upholstery is also varied. It can be made from wood, PVC, vinyl, metal. Some types are cement based.
Do-it-yourself installation of basement siding involves studying some information.
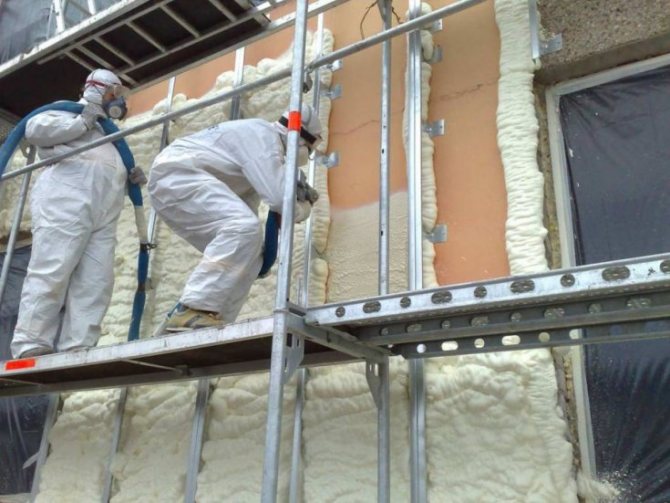
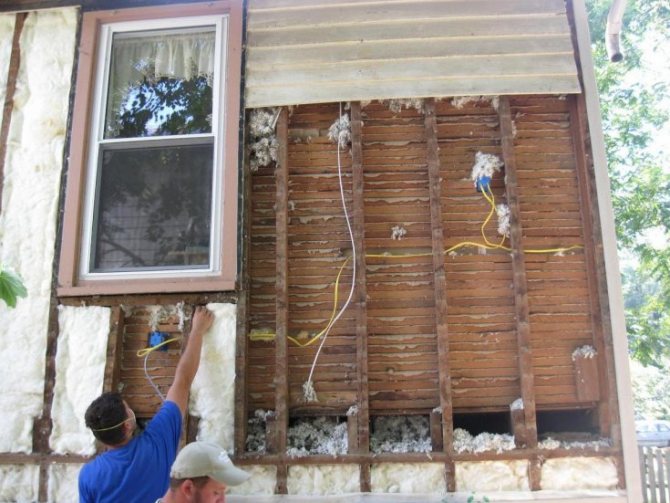
Wall insulation
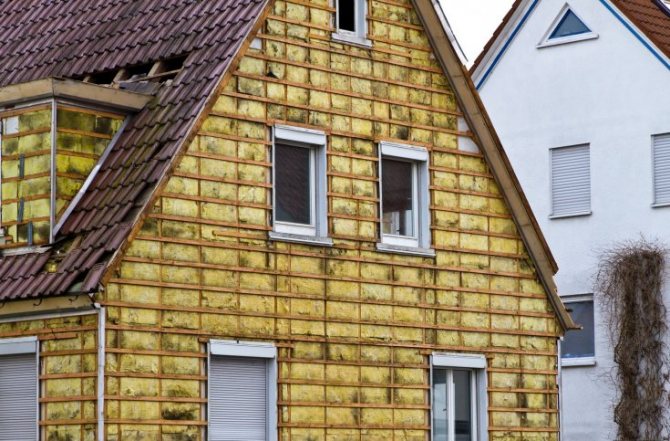
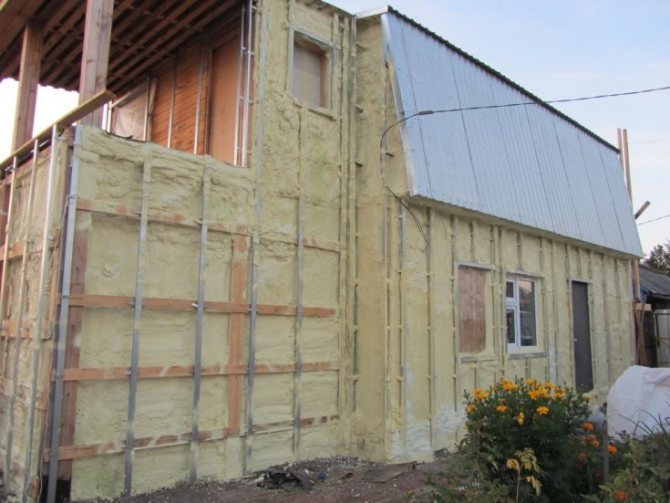
Most often, owners choose to play the role of an isolator expanded polystyrene or mineral wool... However, which of these options would be the most preferable?
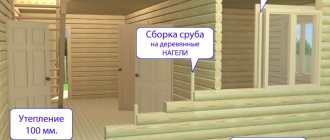
If you seek advice from experts, the better to sheathe a house, it is better to use mineral wool, because, thanks to this, the wall material retains the ability to "breathe", and on the basis of this it can be concluded that they will last for the period that is determined manufacturer. However, if you do not set yourself the goal of living with "eternal" walls and are ready to make certain sacrifices, then you can consider the option with expanded polystyrene.
Do-it-yourself installation technology for these sheets provides for them wall sticker, after which they are additionally fixed using a special installation with a very wide head.
The adhesive can also be used to install cotton wool. However, it is not necessary to do this; to ensure the necessary reliability, some "umbrellas" will be enough. Thus, at the stage of insulation, the choice of material and installation technology, one must proceed from the following parameters:
- Financial opportunities;
- The level of training and weather conditions.
Availability of free time;
If you still opt for the most common materials for decorating your home with siding, then it is advisable for mineral wool use adhesive solution in combination with "umbrellas". You should not have any problems with this, given that this work itself is quite simple: after the fragments of the material of the required size are prepared, they are covered with a layer of glue, and then fixed on the wall. After waiting for the moment when the glue dries up, take the tool and "shoot" the plate.
Siding is dependent on temperature changes
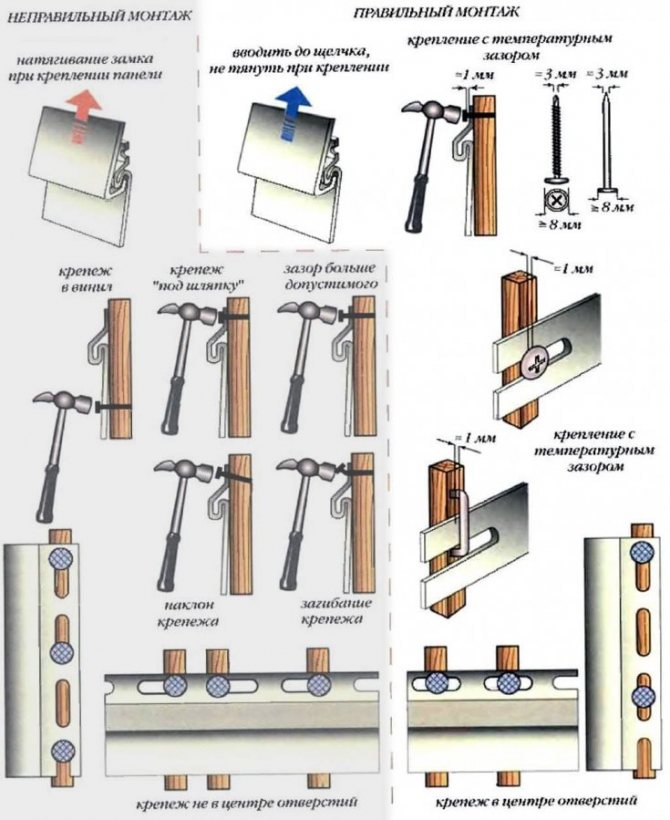
At high degrees, the pores of the upholstery expand. Low values contribute to its compression. This point is important to consider. When carrying out construction work, the material should not be tightly applied to each other.
At room temperature, it is correct to leave a 2 mm distance between the panels. If installation is carried out in winter, the gap is increased to a centimeter. In the heat, nine millimeters is enough.

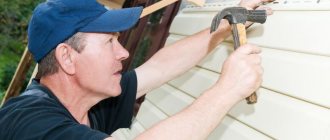
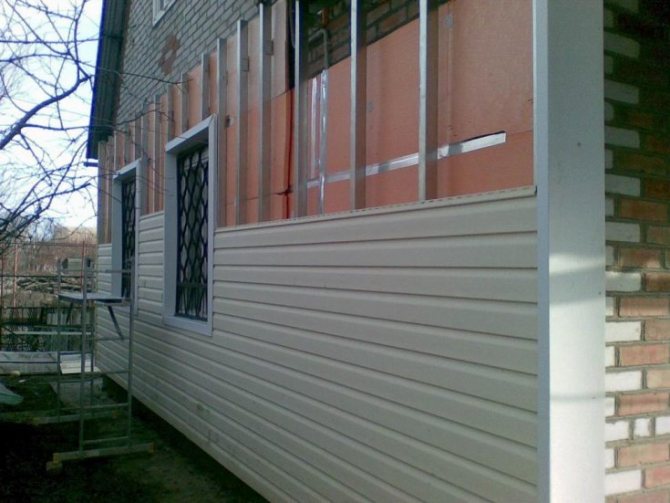
Siding panels are mounted in the middle. Round self-tapping screws or roofing nails are used as fastening elements.
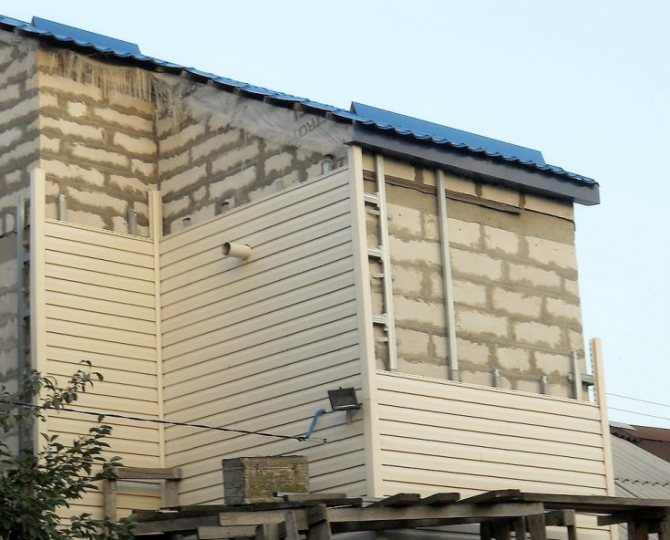
The unevenness of the walls can be easily hidden by lathing made of metal or treated wood. The method is also suitable for a flat surface. This air cushion will insulate the structure.
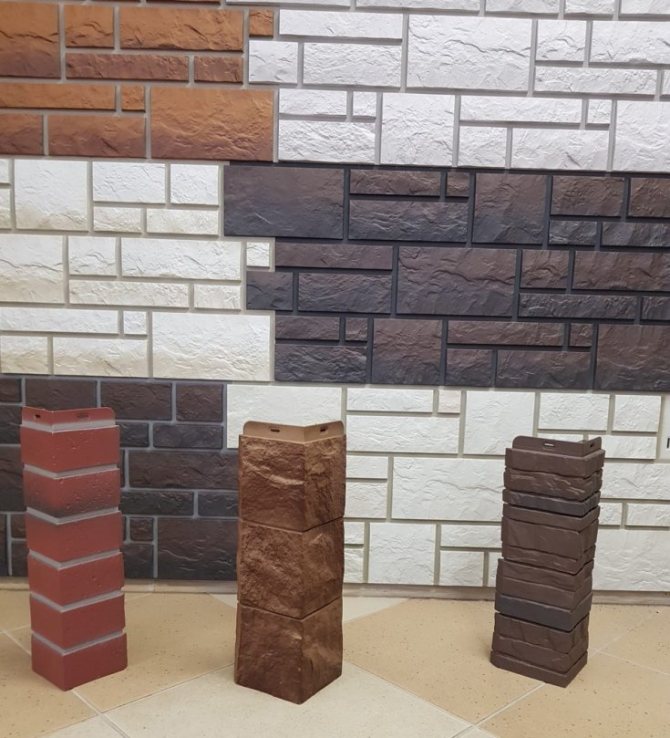
Types of material
Depending on the requirements for the strength characteristics of the coating and the operational properties, it is necessary to choose the type of siding.
There are three types of material:
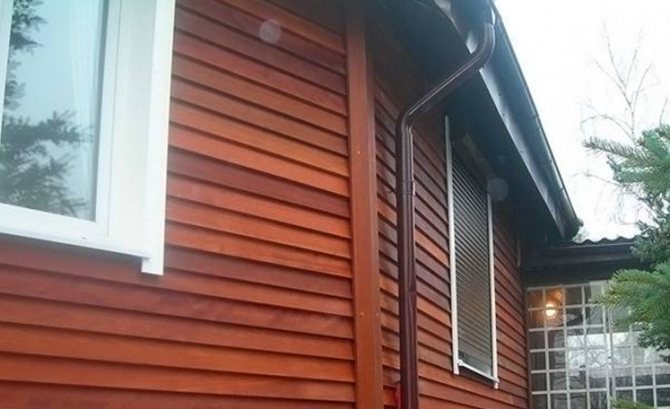
- Wooden - with all the properties of natural wood. These include environmental friendliness, aesthetics and high thermal insulation.Despite a wide range of positive factors, the cost of the material is not high, but there is a small minus. This is an operational period that does not exceed 8 years. In addition, this finish requires regular antiseptic treatment.
- Metallic is a more profitable choice compared to the previous option. High strength characteristics, long service life, resistance to any temperature extremes and damage by rodents or other pests. But again, there is a big minus, poor resistance to mechanical stress. The slightest violation of the integrity of the coating leads to the development of corrosion.
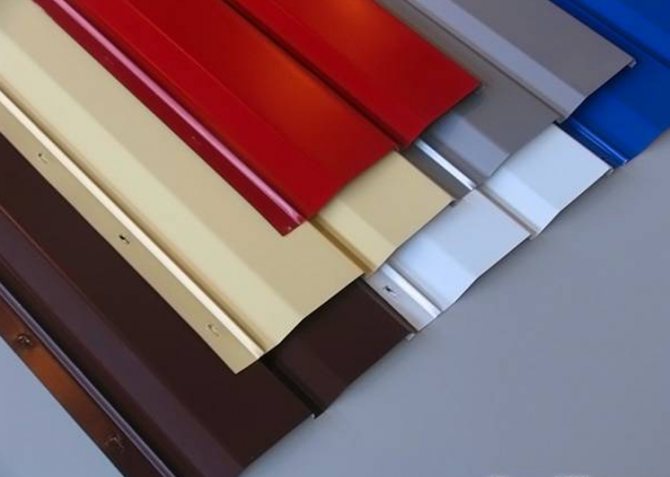
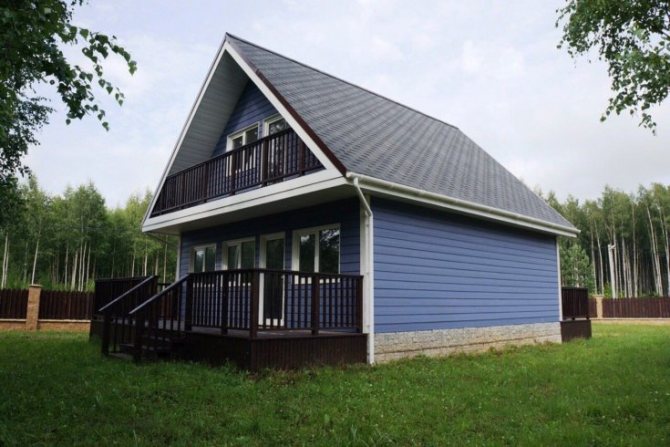
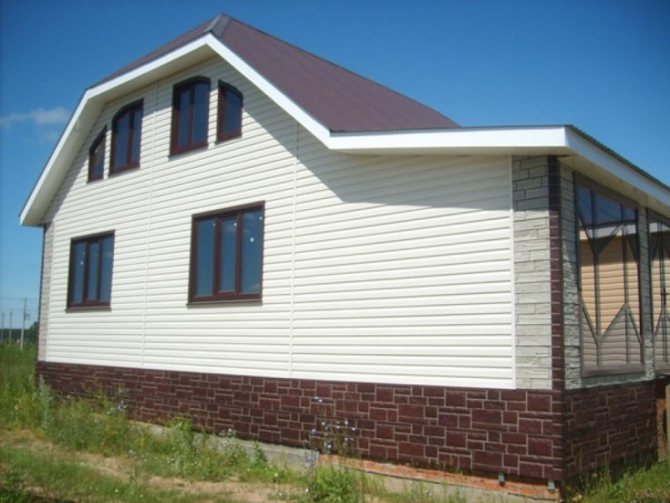
- Vinyl is the most popular siding option, and it is no coincidence. It does not have the disadvantages of the previous two types. In addition, its main characteristics are a long service life, according to the manufacturer, it is equal to 50 years, low weight of panels, ease of maintenance and endurance to many adverse factors: atmospheric phenomena, chemical compounds, mechanical stress. As for the cost, it is relatively acceptable, especially considering the fact of the operational period.
Surface preparation
Before carrying out the main work, you need to foam or cement all cracks, remove protruding elements.
Check it out here!

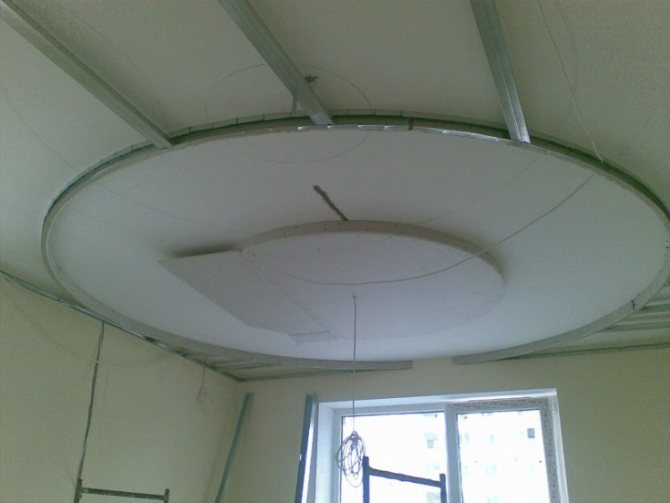
DIY illuminated ceiling: 85 photos of the best options! Types of illumination: spots and peculiarities of their connection, LED illumination, diode illumination, "starry sky"Do-it-yourself shower cabin assembly: pallet assembly, preparation and installation of walls, installation of a portal. All stages of assembly with a photo
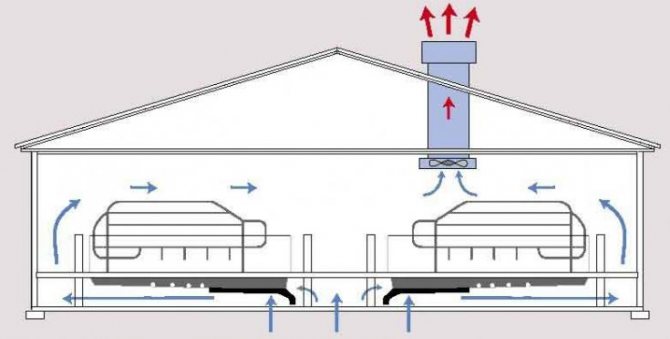
How to make ventilation with your own hands - we provide freshness in the house, we create comfort on our own (photo + video)
The walls are thoroughly cleaned of dirt. When facing with siding, the surface of a wooden house is treated with an antiseptic, and foam blocks are carefully primed.


Selection and calculation of component materials
Vinyl siding manufacturers also produce all the necessary accessories for its installation:
- External and internal corners for facing the corners of a house with a standard length of 3 m. To calculate the required amount, the total area of the corners along the perimeter of the building is measured and calculated, which is divided by 3. It is better not to use short cuts so as not to spoil the appearance of the building
- The starting bar has a length of 3.8 m and is calculated by subtracting the length of the doorways from the value of the perimeter of the house
- The J-profile will be needed in places where extensions are attached to the structure (length 3.8 m.)
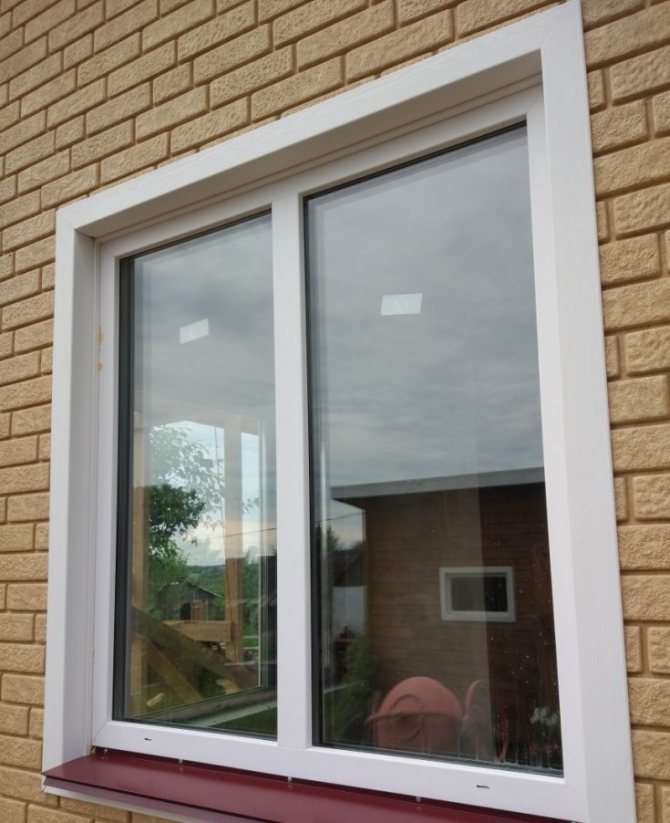
- The plank framing the windows (length 3 m) is calculated by summing the perimeters of the window openings
- Low tides are placed on the windows if necessary
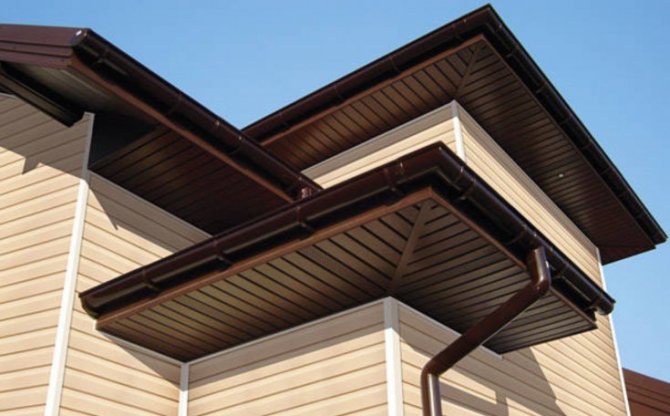
- Finishing plank connects the eaves to the house
- The H-profile closes the joint slots between the siding strips, is installed vertically, calculated by dividing the value of the building perimeter by the length of the siding panel
- The drain bar is installed under the window openings
- The platband is mounted as a cladding of any openings that are flush with the walls
To install the siding with your own hands, you will also need galvanized self-tapping screws with a press washer 25-30 cm long. Their number is calculated based on the area of the walls: 20 pcs per 1 m².
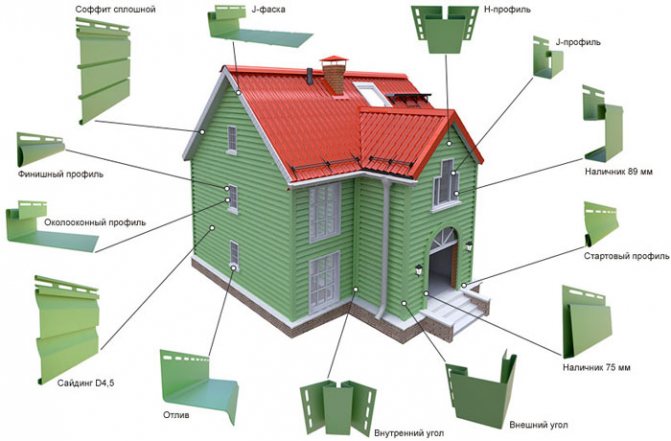
Accessories for vinyl siding
Calculating the amount of siding
Two options are used:
- The area of the walls of the house is calculated, from which the areas of all openings are subtracted. The resulting value must be divided by the area of one siding panel
- A drawing of the house is made and the required number of planks is calculated by the piece. This method is more economical, since you can immediately see where the trimming will go.
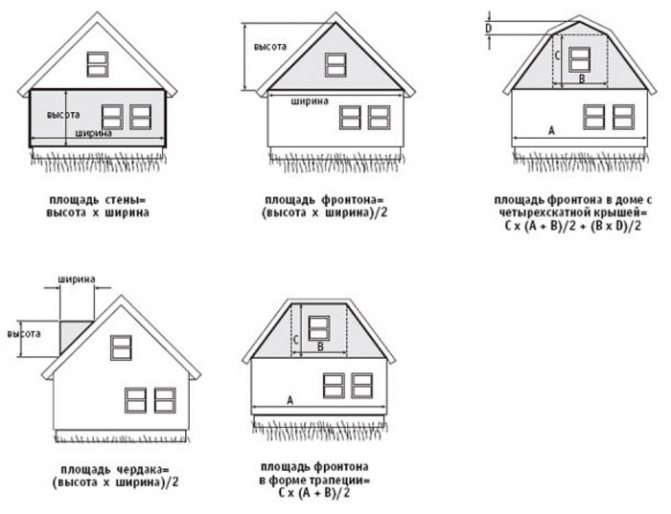
Calculation of the area of the walls for the subsequent calculation of siding
Today the market offers a wide range of siding from different companies. One of the most popular Russian companies is Grand Line. Vinyl siding of the Grand Line is of high quality. This material is highly shock and UV resistant.
Siding from the Nordside company is gaining more and more popularity. Read more about Northside siding here. The material of this company has a wide range of colors. Nordside siding does not collapse, moisture does not affect it, it does not rot, does not rust, the paint does not fade.
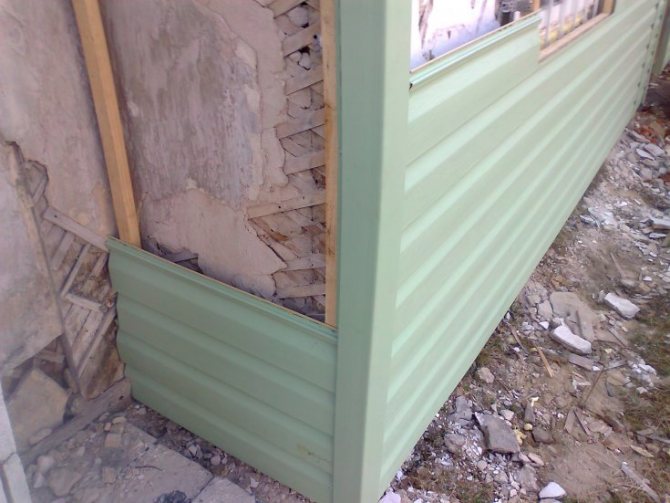
Preparatory stage
The advantage of this type of material is that it does not require preliminary leveling of the walls. It is enough just to clean the surface of dirt or previous cladding, remove protruding elements (plinths, platbands, gutters, etc.).
If cracks are found on the surface of the walls, then they are sealed with cement mortar to prevent the accumulation of moisture in the winter.
Important! Wooden walls are cleaned of mold and mildew and treated with deep penetration soil with an antiseptic.
The surface on which the facing material is installed must be absolutely dry, such a requirement is set by the siding installation technology.
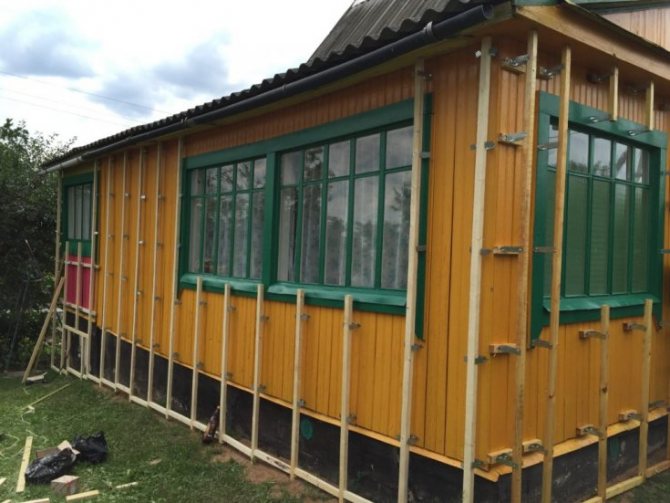
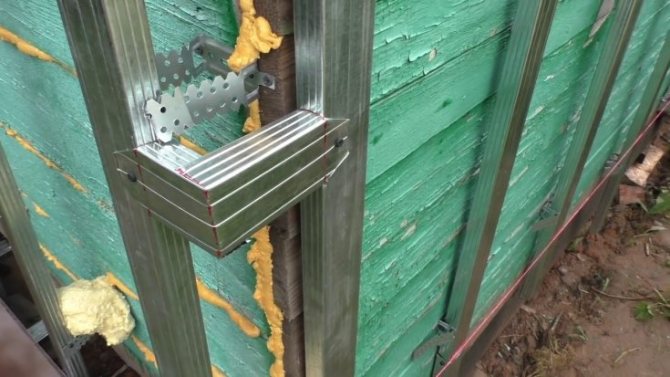
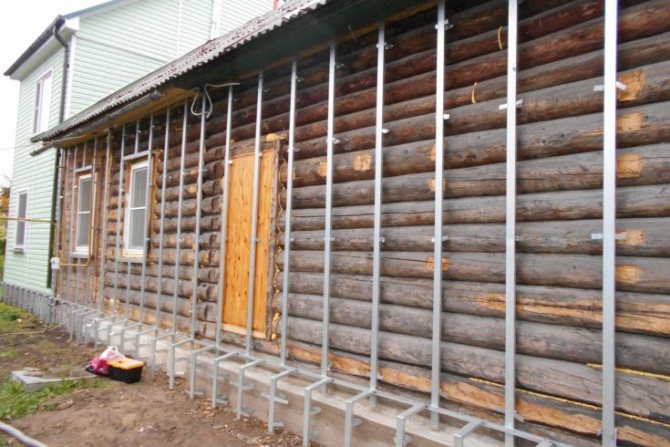
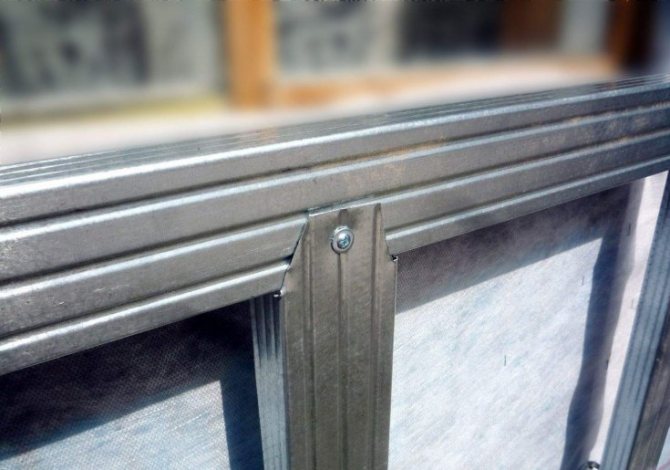
Installing lathing for siding
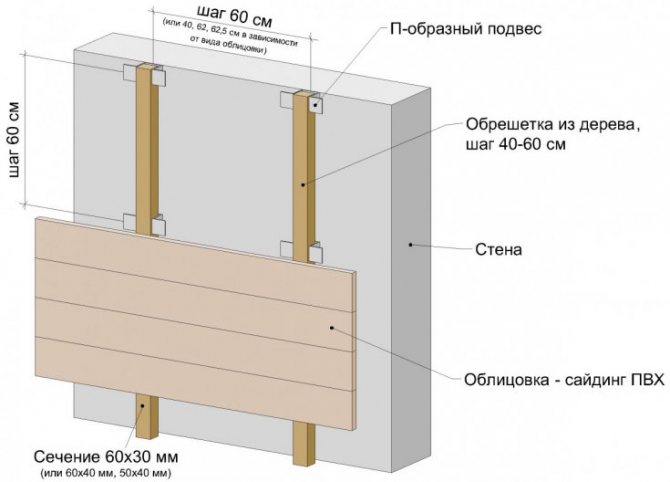
The lathing is made according to the principle:
- When laying siding horizontally, a wooden or aluminum profile is packed vertically
- Wooden bars should have a cross section of 20-40 mm. Galvanized profile lathing will cost 30% more, but it will turn out to be more reliable and durable
- The distance between the profile (bars) should be 30-40 cm.They are placed under the level
- First, a guide is stuffed on the left corner of the wall, then a bearing horizontal from the bottom, the next vertical in the right corner. Additionally, all openings are tied
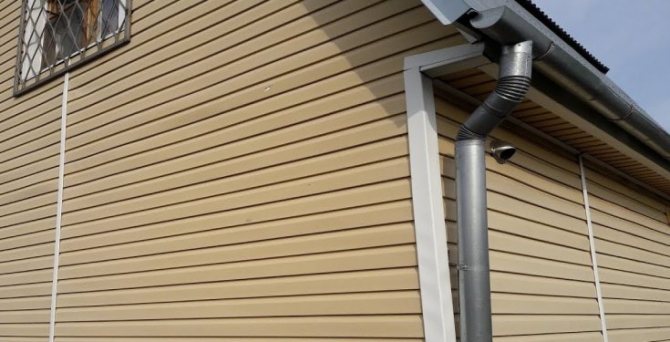
- In the manufacture of the lathing, the location of gutters, lamps and other communications is taken into account. For this, additional guides are mounted on the crate
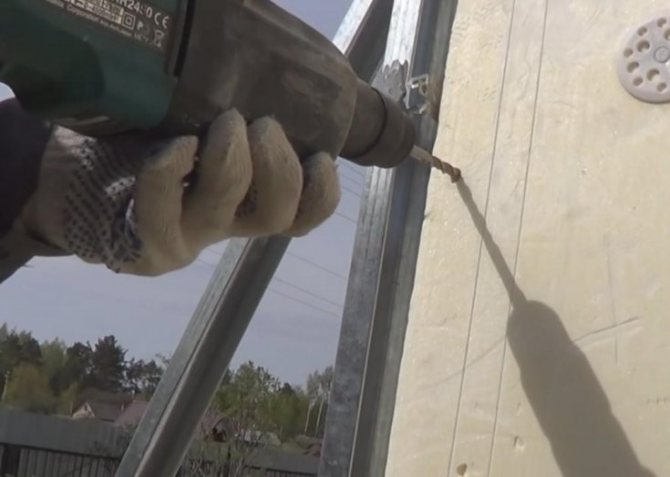
- The frame is attached to the wall using dowels (if the walls are made of bricks, shell rock), self-tapping screws (wooden surfaces)
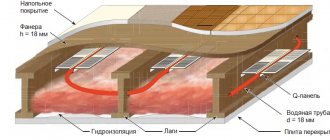
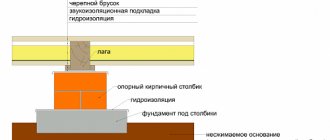
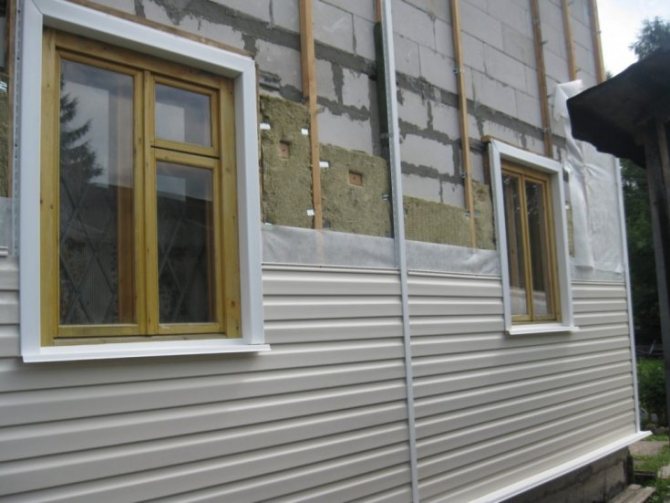
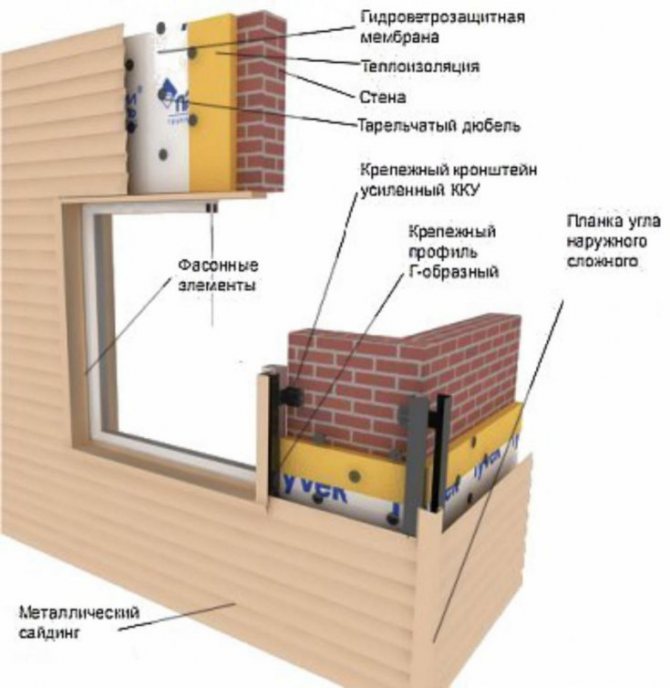
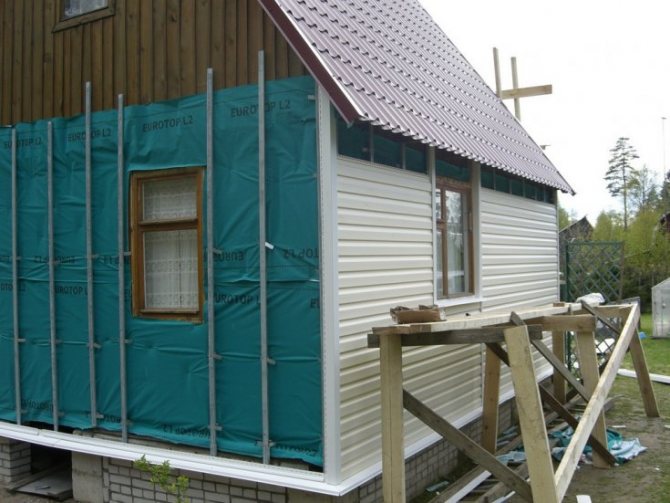
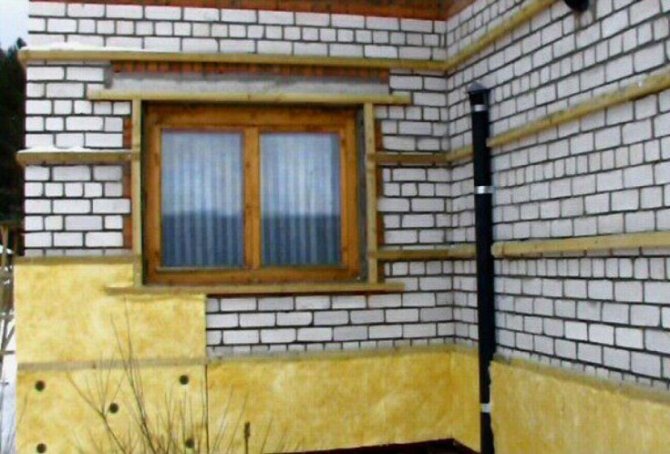
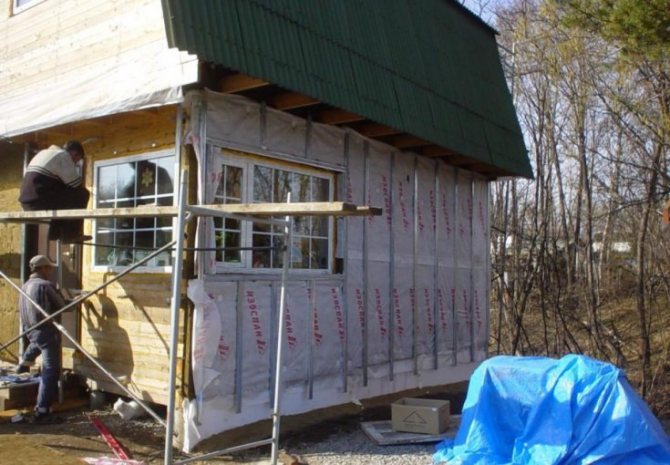
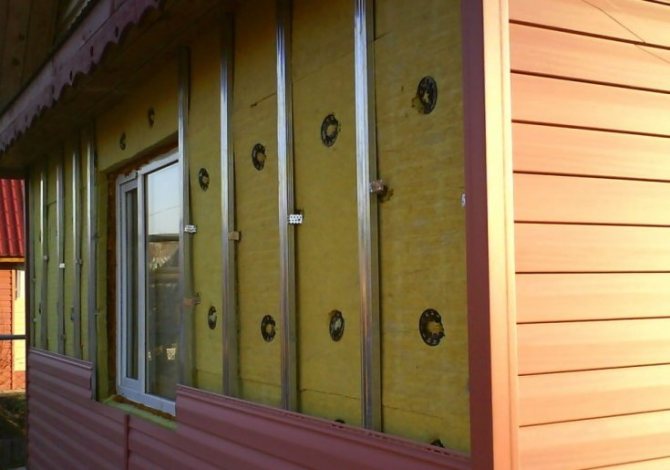
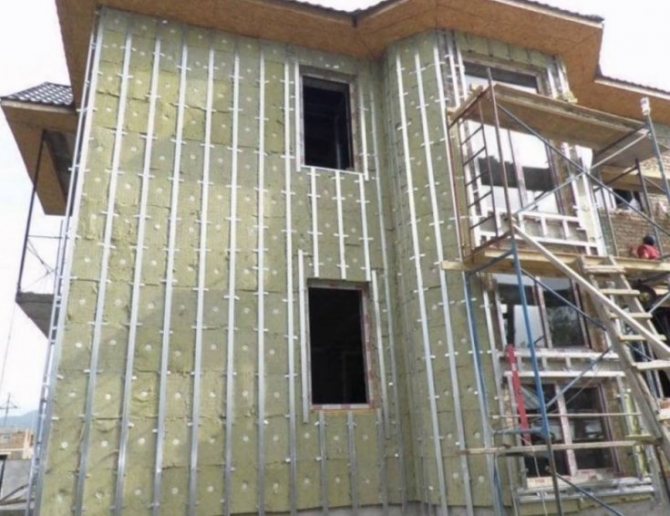
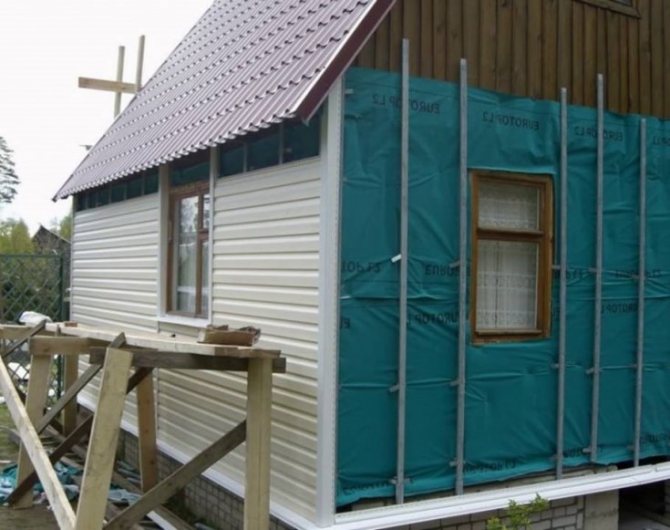
Carrying out measures for insulation and waterproofing
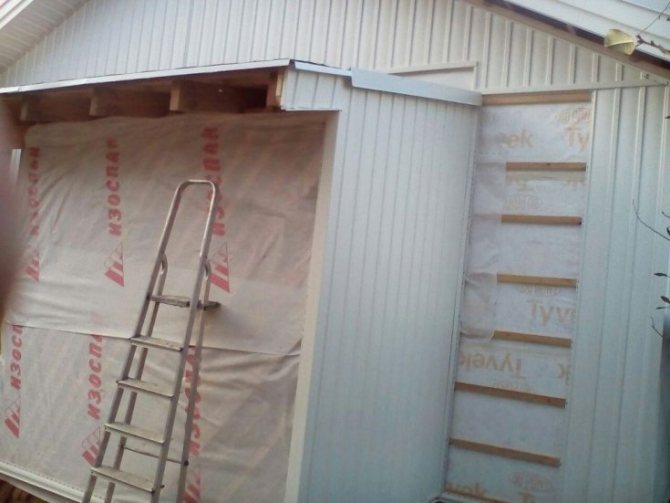
Insulation (polystyrene, mineral wool) is placed in the crate. The main thing to consider is that you need to leave space for the ventilated space between the wall surface and the facing material to prevent decay processes.
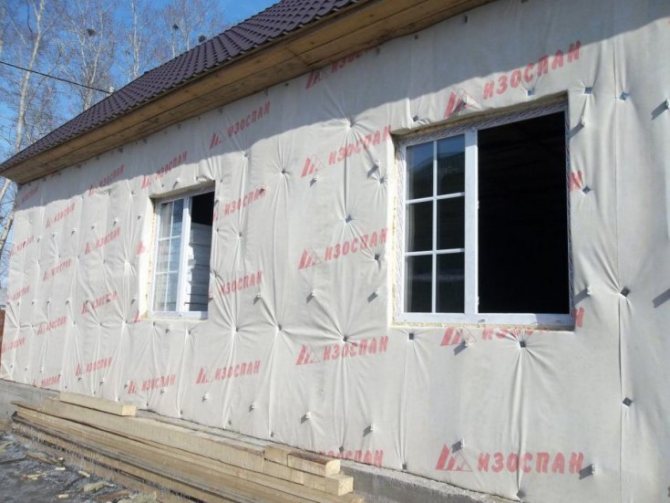
From above, the insulation is closed with a hydro-barrier, installed vertically or horizontally with an overlap of 10 cm. The hydro-insulator is attached to the wooden crate with a stapler. The joints can be sealed with tape.
After carrying out heat and waterproofing measures, the frame is made directly under the siding. The principle of the lathing remains the same: a metal profile or wooden slats are stuffed with a step of 30-40 cm, all openings are additionally framed.
Vinyl Siding Installation Instructions
Installation of vinyl siding involves the following sequence:
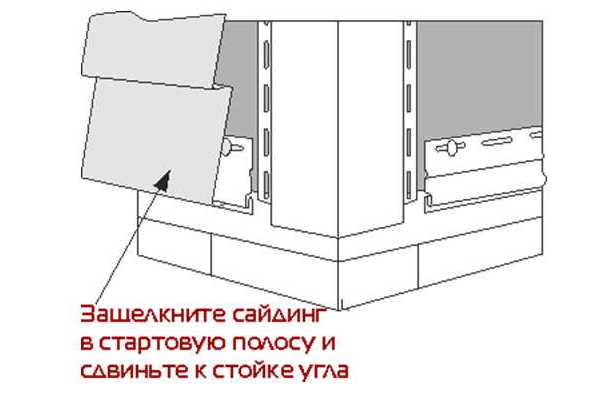
- Installation of corner strips
- Attaching the starter bar
- Fitting the J-profile as a trim for siding edges
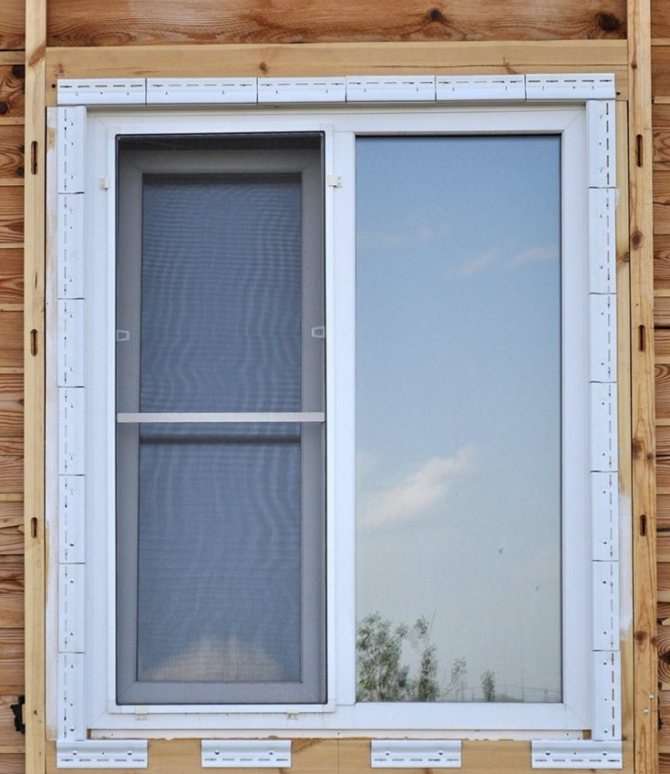
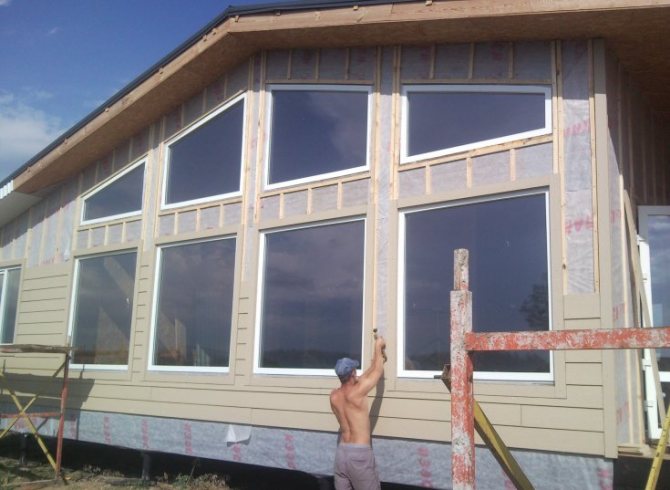
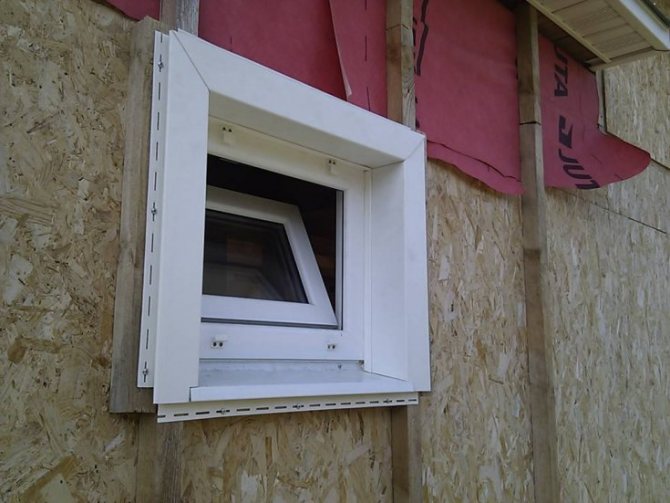
- Finishing around window openings
- Cladding with siding panels
- Installing the finish bar
The installation of the starting bar takes place along the perimeter of the structure; it is important to set it carefully. Fastening with self-tapping screws with a pitch of 25-30 cm is used, and perpendicular to the surface. The fasteners are screwed in strictly in the middle of the oval-shaped hole to prevent material distortion. The main thing is that the self-tapping screw does not enter the bar completely, that is, a gap of 1 mm remains between its cap and the siding (for convenience, you can attach a coin). In the middle of the joining of two starting strips, a gap of 5-7 mm is required.
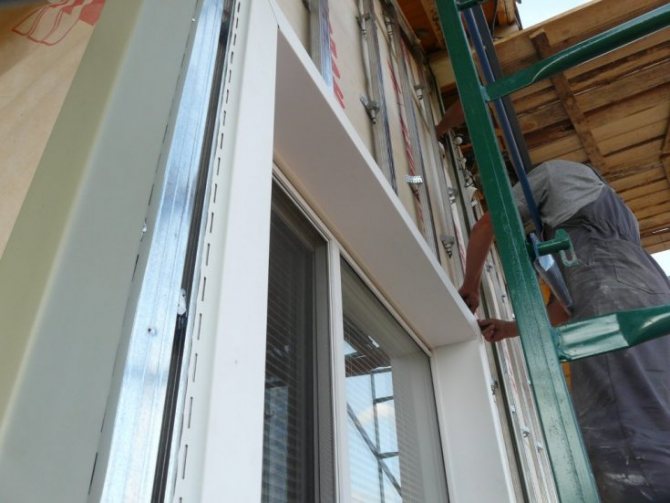
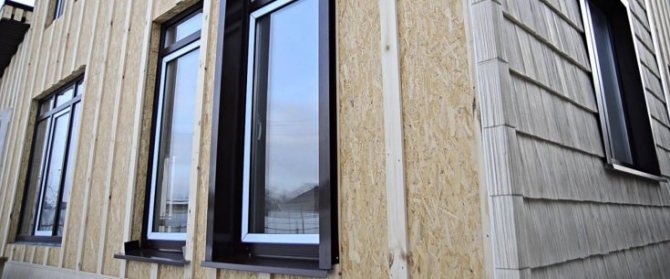
Window and door openings that are in the same plane with the wall are sheathed with a wide J-profile (casing), into which the siding is subsequently inserted.
In the case of slopes, the decoration is reduced to siding with an angle profile. Moreover, first the lower slope is lined (if there is no low tide), then the side slopes are shifted to the center of the opening to prevent the top panel from coming out of the grip in winter, and at the end - the upper one.
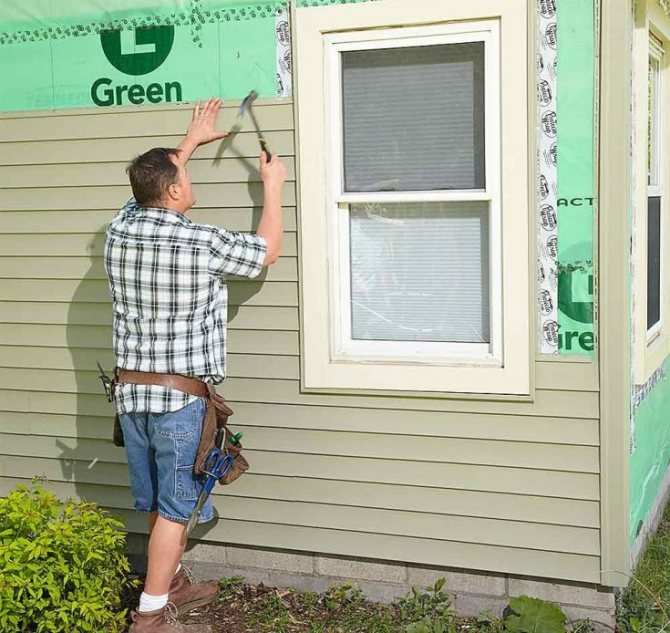
When installing, the siding panels must fit into the starter bar and snap into place. Then only the material is fixed with hardware. The fastening of the cladding material takes place under constant level control. For convenience, you can pull on the rope.
The finishing strip is attached at the top under the roof itself, further from it the value is measured to the last siding panel. The tailored strip arches and slides under the finish panel.
Vinyl siding installation price
How much does it cost to sheathe a house with siding? The cost of installation work on siding cladding depends on the following factors:
- Prices for raw materials, including the manufacture of lathing, insulation, waterproofing, type of fasteners
- The number of door and window openings
- Depending on the building material (brick, wood)
- With or without insulation
Fastening the lathing
For the basis of the lathing, wooden slats or a metal frame are used. Concrete and brick surfaces are galvanized with a profile.
First, the walls are marked out in a straight line using a level, then they begin to fasten the vertical elements.
The distance between the two slats is about 40 centimeters. Places of corners and window blocks require additional guides.
How to calculate the material for cladding
If you have saved the project at home, then it will not be difficult to calculate the amount of siding for cladding. But even in its absence, it is enough to walk with a measuring tape around the entire house and measure the length and width of each wall, taking into account doorways and windows.
In addition to the main material, it is necessary to determine the number of wooden slats for making the frame, which must be fastened at a distance of 40-50 cm from each other, and the amount of heat-insulating materials. Do not forget to include in the list of materials and all additional panels.
In the absence of experience in the finishing business, do not forget to purchase material in reserve, in case mistakes were made during the calculations or during fastening you damage the panel.

Protection against temperature extremes
Upholstery work involves preliminary insulation and protection of walls from moisture penetration. The need for thermal insulation is considered individually, while waterproofing is a prerequisite for installation.
Check it out here!
How to make a drywall arch: we make an interior arch according to the photo instructions. 120 photos of arches in the interiorHow to make a balcony with your own hands - tips on how to make a beautiful balcony in an apartment. Step-by-step guide to the use of modern building materials + 70 photos of the best design options
- Do-it-yourself coupe door installation - step-by-step instructions for installing sliding doors and advice on choosing accessories (110 photos + video)
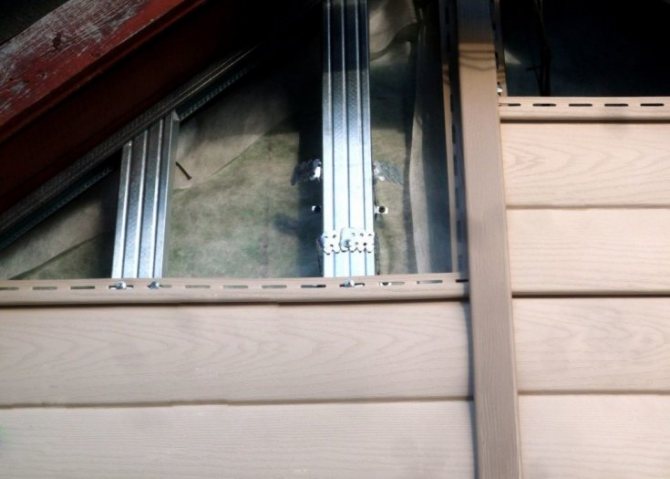
Fastening the guide parts
Installation of elements begins with the drainage area. The profiles are fixed at the corners with self-tapping screws, after which the main guide element is attached.
In the area of the window opening, the strips and profile are fixed in such a way that the lower edge on the outside is slightly lower than the inside. The door is framed around the perimeter with a profile marked J.

Siding panels are fixed so that there is a small gap at the bottom, half a centimeter is enough. Above, all the shortcomings will be hidden by the closing bar.
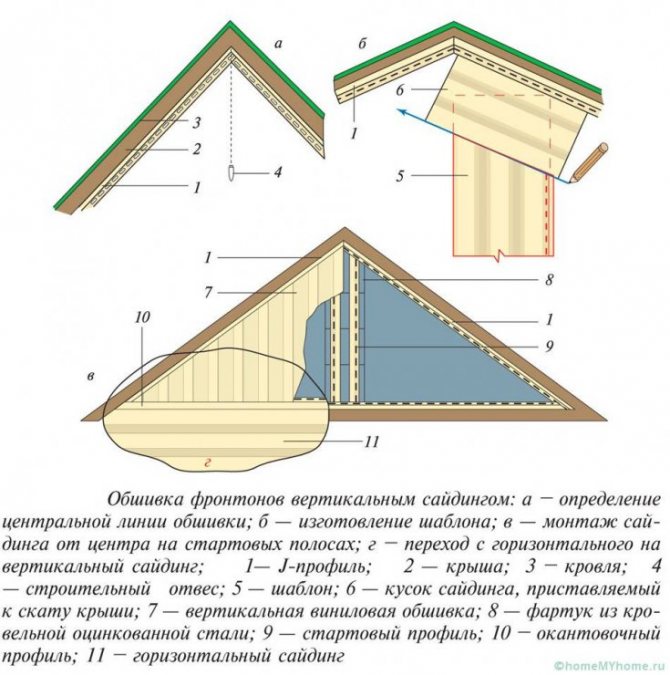
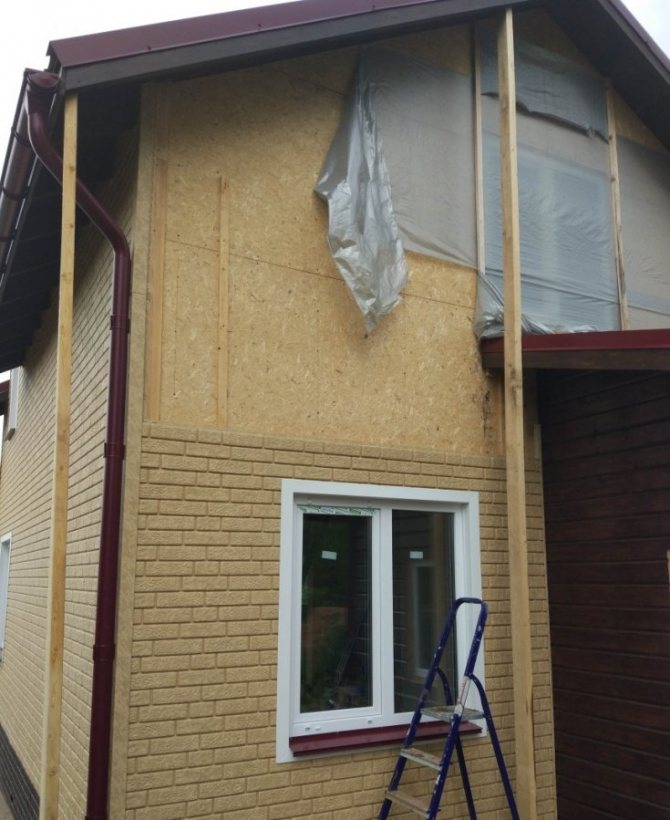
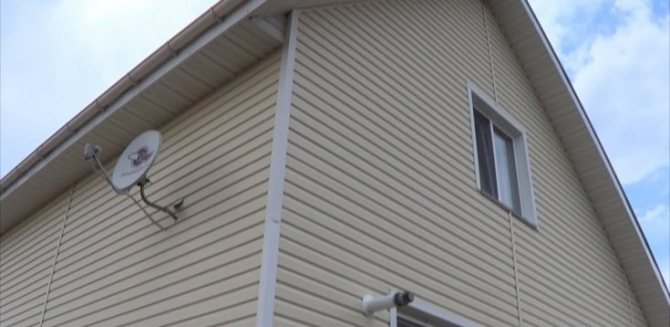
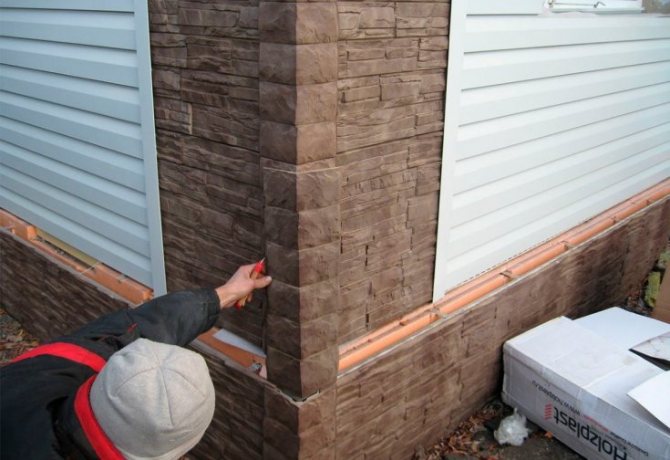
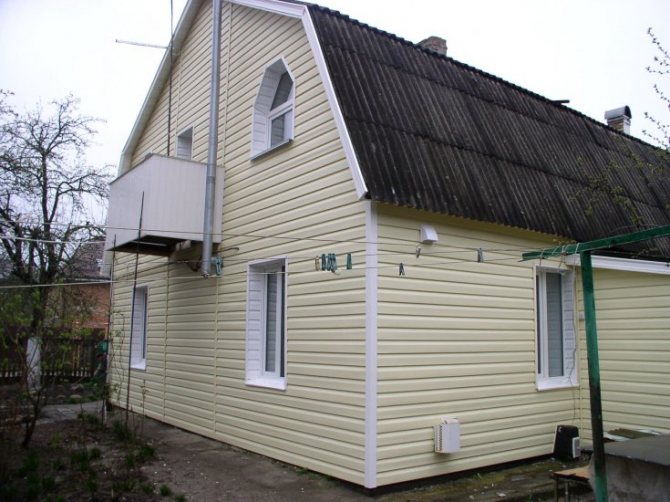
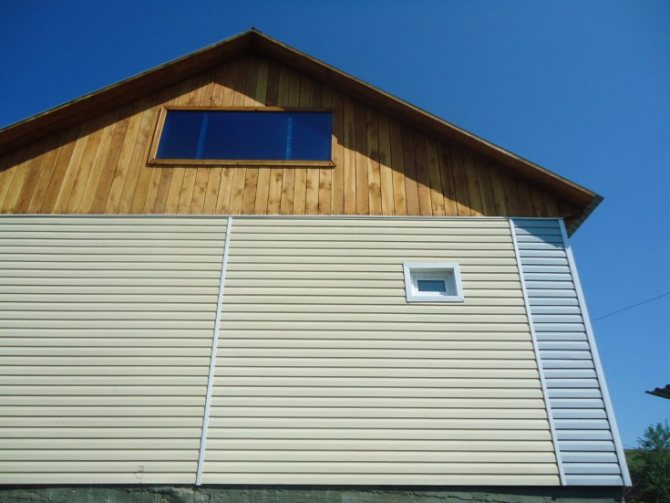
Gable trim
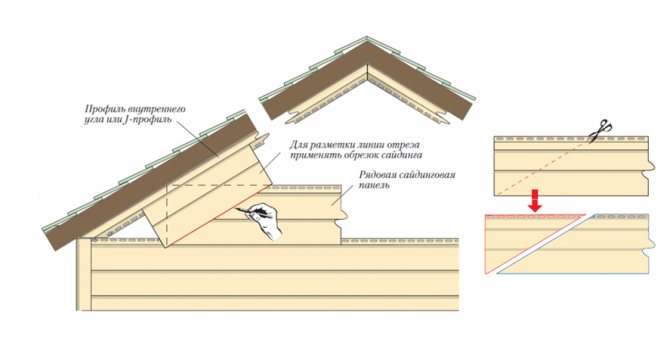
After finishing the house, you can stop, or continue finishing work and decorate with siding and the pediment. The finishing process is as follows:
- For finishing the front, it is necessary to install the J-profile around the entire perimeter
- Further installation of the planks is carried out according to the same principle as the walls. The main thing to remember is the technological gaps, 6 or 9 mm, depending on the season when the finishing is done.
The process of trimming the panels is shown in detail in the figure, please note that at this stage you need to carefully make the markup, rechecking it each time so that the installed panel fits perfectly to the plane.
Separate measurements must be taken for each plank.
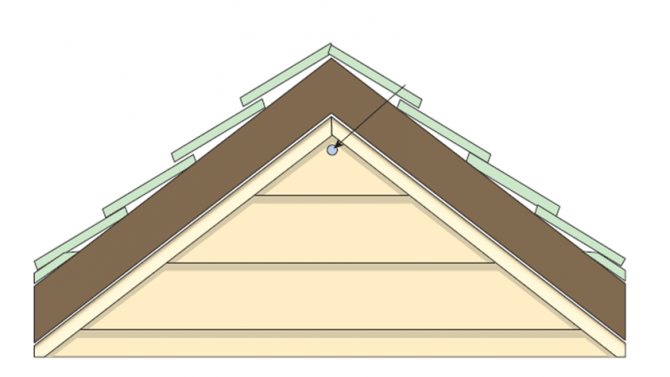
The last panel, at the very top of the pediment, is not attached like the previous ones. It is allowed to fasten it through the front side of the strap.
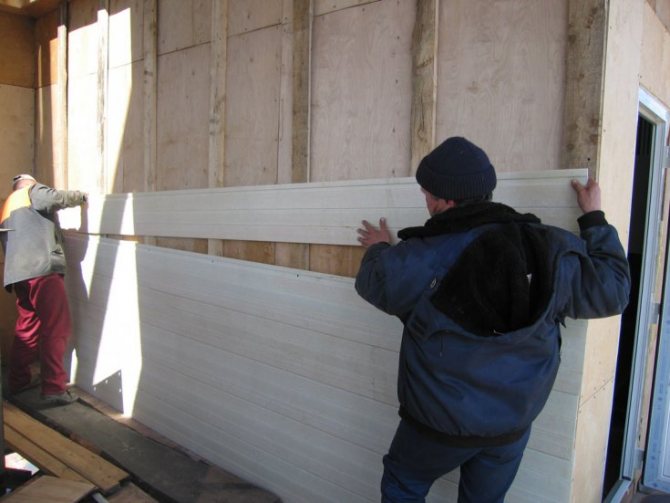
Installation of panels
After installing the guiding elements, you can start attaching the siding. The basic installation is started by fixing it to the main starting plate. The rest of the panels are fixed in the same way.
The distance between the elements must be respected, they must not overlap. If the panels are long and require trimming, alignment with a color-matched H-rail is applied.
Check it out here!
Do-it-yourself countertop installation: selection, installation and fastening of the countertop. 155 photos of the best ideas and tips for their applicationDo-it-yourself canopy - beautiful ideas, best projects and tips on how to build a canopy with your own hands (90 photos and videos)
Do-it-yourself pool - 115 photos of the best ideas for building a vacation spot and an overview of current projects

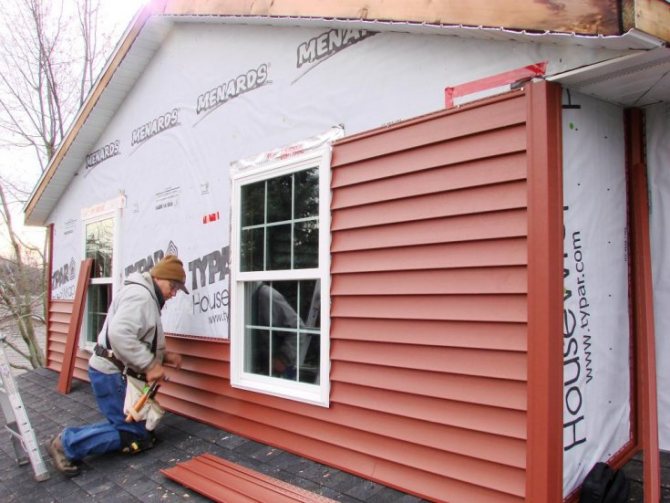
Do-it-yourself installation of metal siding is carried out from the bottom up. The same principle of fastening and vinyl material.
Armed with theoretical knowledge and having watched several videos of do-it-yourself siding installation on the Internet, you can try.


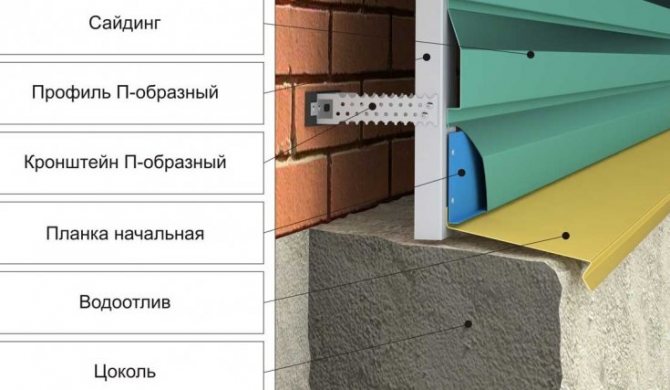
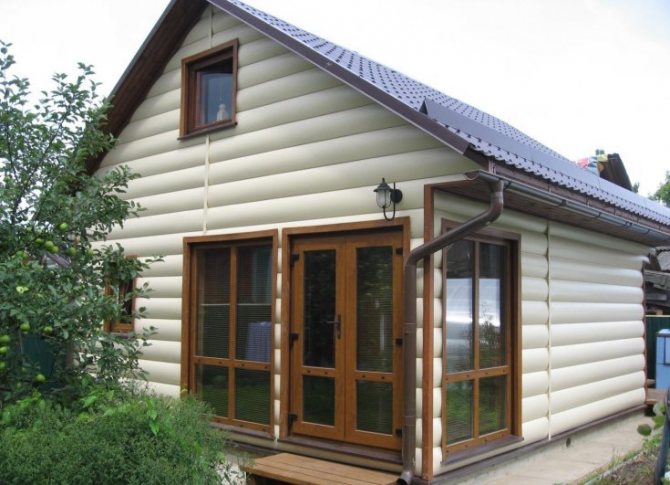
Siding facade finishing technology
Finishing the facade of the house with siding begins with securing the starting bar with galvanized nails or self-tapping screws. The next to be installed are the corner pieces and the connecting H-profile, if provided. Window and door openings are edged with a J-profile.
Next, siding panels are installed. The wall panel is installed in the starting and corner strips and fixed with nails or self-tapping screws. Siding panels are assembled from the bottom up. Each next one is joined by the comb-in-groove method with the previous one and only then is attached. A correctly installed panel can be moved by hand to the right and left. Rigid fixation should not be allowed. Rigid fastening is allowed only when installing metal panels. When fixing vinyl and wood, a gap of 1.5–2 mm remains between the cap and the panel. The material changes in volume under the influence of temperature and moisture and is damaged when rigidly attached.
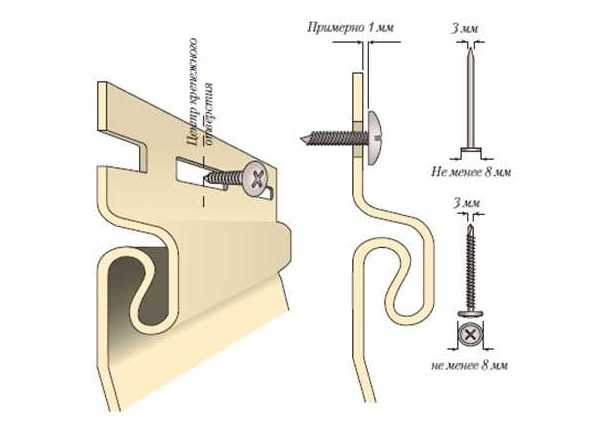
Siding produced for exterior decoration of the house has special holes on the fastening strip. The nail (self-tapping screw) must be placed in the middle of the hole.
The finish bar is fixed last. The last finishing panel is inserted into it from below. After that, all facade structures are assembled back into place.
Photo of the process of installing siding with your own hands


Read here - Do-it-yourself tabletop installation: selection, installation and fastening of the tabletop. 155 photos of the best ideas and tips for their application