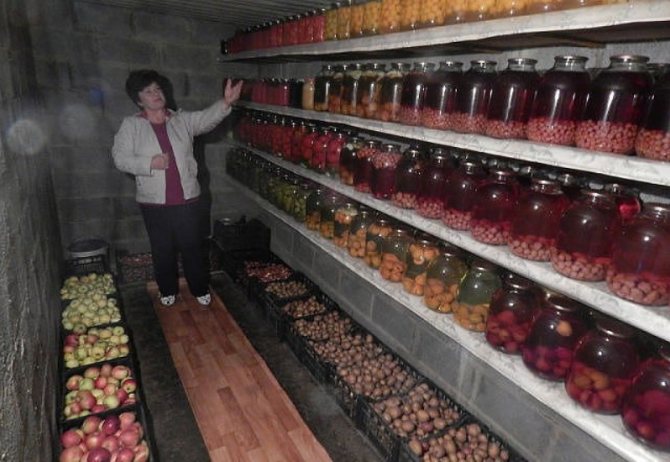
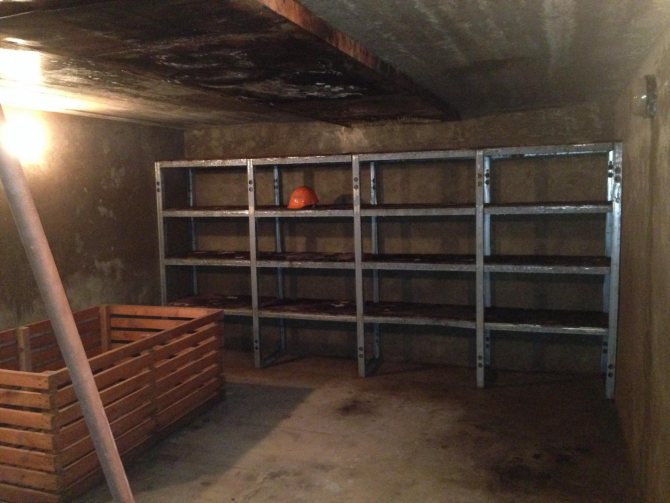
Setting up a basement in a garage is common. It is very convenient, practical, while a fairly decent volume is formed, which can be used as a place for storing things, crops, conservation. As a rule, it is a basement and is used as a storage for food and vegetables. In this regard, there is an additional need for high-quality ventilation of both the basement itself and the garage space as a whole. Ventilation in the basement of the garage is a simple, reliable way to organize the microclimate necessary for these premises.
Features of the basement device in the garage
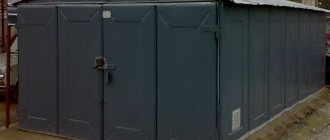
- The garage basement is a structure isolated from the external environment. The entrance is located inside the garage.
- There are no sources of natural air flow at all.
- Given the depth at which it is equipped, we can say that it is warm enough there in winter. This inevitably causes condensation to build up.
- Through the entrance opening, moisture penetrates into the garage room, creates excess moisture there, which affects the structure in the most negative way.
- The arrangement of the basement with ventilation passes through or with the help of the garage space.
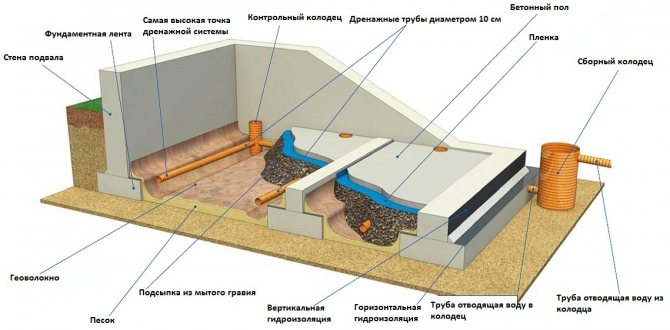
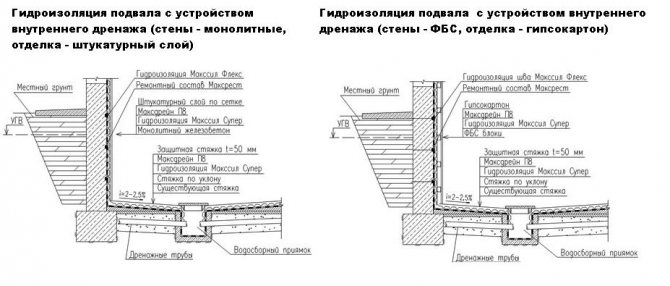
- Placing a basement in the ground requires a special hydro- and heat-insulating finishing of internal surfaces (impregnation of the floor, walls, special materials, insulation of floors with mineral wool).
Why do you need basement ventilation in a garage?
To maintain a favorable microenvironment of the basement, it is extremely necessary to constantly efficiently ventilate it, which is due to a number of reasons:
- In the cold season, the ground around the basement does not freeze, its temperature remains positive, warming up the air in the room. This creates a high level of humidity, which contributes to the constant accumulation of condensation.
- Dampness adversely affects wooden elements, parts of the basement, is a favorable environment for the appearance of mold, fungus, pathogens, moisture-loving insects. This is especially dangerous if the basement is to be used as storage for crops.
- It is also highly undesirable for excess moisture to enter the garage, where it will settle on metal surfaces, causing corrosion (in particular of a car).
- If groundwater passes nearby, high humidity will persist for a long time. Therefore, the basement must be dried constantly.
- In addition, it is necessary to observe a certain temperature regime, when coolness is required in summer, in winter - the permissible level of heat (when it comes to storing vegetables, preserving).
- When installing a basement under the garage, there is a high probability of the penetration of toxic substances, fuel vapors, exhaust gases, etc. Let there be a small number of them, nevertheless this is not at all desirable.
Considering the above factors, we can say with confidence that proper ventilation of the garage with a basement is simply necessary. In this case, the garage itself should also be well ventilated.
Ventilation in the office. How to organize, standards. All the fun about ventilation!
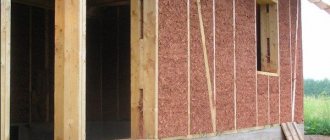
Choosing a heater
We decided to insulate the cellar, but we don't know how to do it, and most importantly what material to use.
Let's look at how to insulate a cellar in a garage using modern materials that experts use to insulate basements:
- foam or extruded polystyrene foam;
- mineral wool;
- "Warm" plaster;
- glass wool;
- reflective insulation.
Warming the cellar in the garage with the above materials allows you to achieve good thermal insulation properties and exclude the appearance of fungus in the room, but each of the materials has its own advantages and disadvantages.
Extruded polystyrene foam or foam
Advantages:
- easy installation;
- environmental friendliness;
- you can use extruded polystyrene foam for floor insulation;
- service life up to 40 years and more;
- excellent water resistance;
- low cost;
- perfectly tolerates sudden changes in temperature.
Disadvantages:
- possesses flammability;
- does not allow air to pass through.
Helpful information! Extruded polystyrene foam differs from polystyrene in its increased density and strength. Thus, the coefficient of thermal conductivity of the extruded polystyrene foam will be higher than that of the foam with the same material thickness. In addition, only extruded polystyrene foam is used to insulate the flooring.
| Characteristics | Expanded polystyrene PSB-30 | Polyfoam PSB-35 |
| Density (kg / m3) | 30−32 | 27−29 |
| Thermal conductivity coefficient (W / mK) | 0,032 | 0,038 |
| Compressive strength (MPA) | 0,25 | 0,08 |
Important! When using foam or extruded polystyrene foam as thermal insulation, it will be necessary to treat all surfaces with a primer before starting work and, upon completion, additionally plaster the walls using reinforced, and make a cement and sand screed on the floor.
Mineral wool
Advantages:
- allows air to pass through, allows the room to "breathe";
- excellent sound insulation;
- excellent thermal insulation;
- affordable cost;
- long service life of 30 years or more.
Disadvantages:
- an additional frame is required for installation;
- allows moisture to pass through;
- work is carried out in special clothing and gloves.
Important! If mineral wool is chosen as a heater, then it will be necessary to additionally make a vapor barrier in the basement in order to exclude the absorption of moisture by the wool itself and the deterioration of its thermal insulation properties.
"Warm" plaster
Advantages:
- excellent thermal insulation;
- affordable cost;
- excellent sound insulation.
Disadvantages:
- it is necessary to apply a thick layer for good thermal insulation;
- difficulty in installation.
Recommendation! It is best to use "warm" plaster for coating surfaces together with other thermal insulation materials in order to achieve good thermal insulation.
Glass wool
Advantages:
- low cost;
- good thermal insulation properties;
- good sound insulation properties.
Disadvantages:
- work is performed in special clothing and gloves;
- an additional frame is required for installation;
- allows moisture to pass through;
- may give off an unpleasant odor if exposed to moisture.
Important! If mineral wool is chosen as a heater, then it will be necessary to additionally make a vapor barrier in the basement in order to exclude the absorption of moisture by the wool itself and the deterioration of its thermal insulation properties. In addition to the vapor barrier material, it is necessary to use a film or foil to insulate glass wool.
Reflective insulation
Advantages:
- high thermal insulation properties;
- material thickness is only 2 to 5 mm;
- easy installation;
- the ability to use facing material.
Disadvantages:
- cost;
- possible heat loss
Important! Reflective insulation is thin enough and, like a mirror, will reflect infrared heat when reflected. As a result, it is not efficient enough for convection or induction of reflected heat, which leads to its loss.
Natural ventilation of the basement in the garage
Natural ventilation in the basement of the garage is the simplest, least costly of all possible methods. This ventilation option differs mainly in disadvantages, rather than advantages.But under certain conditions it can be a pretty good solution for organizing air exchange processes in an underground storage.
Pros:
- Ease of installation, simple principle of operation based on the laws of physics.
- Affordable cost.
- Minimum installation effort.
Minuses:
- The natural air flow may not be enough for good ventilation of the basement space. Especially if it constantly collects moisture from the ground.
- In summer, when the air temperature is high, the draft weakens, sometimes it completely stops, the air circulation stops.
- Great dependence on atmospheric conditions of the environment.
- Air exchange failure due to strong wind from the wrong side.
Natural ventilation can be effective when:
- the basement is arranged with good thermal and waterproofing;
- condensate does not accumulate in large volumes;
- the soil around the structure is not saturated with groundwater, which means that there is no excess moisture inside it;
- the inlet is located inside the outer wall of the garage, not in the ceiling.
Forced ventilation in the basement of the garage
A forced ventilation device in the basement of the garage is the best option, especially for a crop storage.
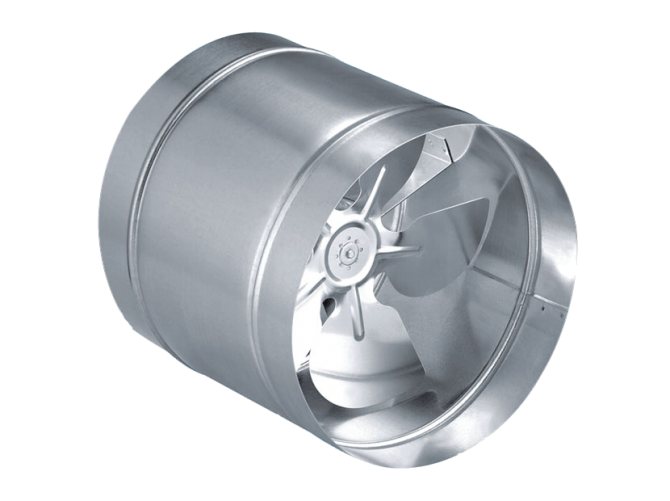
It is the organization of air exchange using supply / exhaust electrical mechanisms. They are placed inside ventilation ducts (duct fans), openings (axial, centrifugal fans). In this case, it is necessary to follow the electrical safety during installation. After all, the building is with a high level of humidity. It must be properly waterproofed; it is also recommended to insulate all wiring.
Benefits mechanical ventilation for the basement space:
- The constant change of air flows normalizes the humidity level. Dampness does not stagnate, it is removed outside.
- The frequency of changing the air in the basement space is in accordance with the established sanitary standards.
- The temperature regime corresponds to acceptable indicators.
- The microenvironment is normalized, contributing to the long storage of the crop, preventing the appearance of mold, fungus, rot, insects (when it comes to using the basement as a cellar).
- Penetrating vapors of chemicals, toxic gases, exhaust products are discharged through the exhaust duct without lingering inside the basement space.
- The operating time is regulated by a timer.
Disadvantages:
- Cost of equipment.
- The cost of electricity from which the mechanisms work.
- Installation of the ventilation system becomes more complicated.
Combined ventilation system for the basement of the garage
The combined option also allows you to organize good ventilation in the basement of the garage, while saving on the supply fan. Here the ventilation mechanism is installed inside the exhaust opening / duct, forming a mixed type of air circulation with natural ventilation.
To connect the fan, a well-insulated power supply is required. Principle of operation - due to the increase in the outflow of exhaust air, the thrust increases, and, accordingly, the supply air is supplied in a large volume.
Advantages:
- Good ventilation rates of the storage facility.
- The removal of stagnant air is increased
- The ability to set the time intervals for the fan (if there is a timer).
- Not the most difficult installation option.
Disadvantages:
- Electricity costs.
- Exhaust equipment cost.
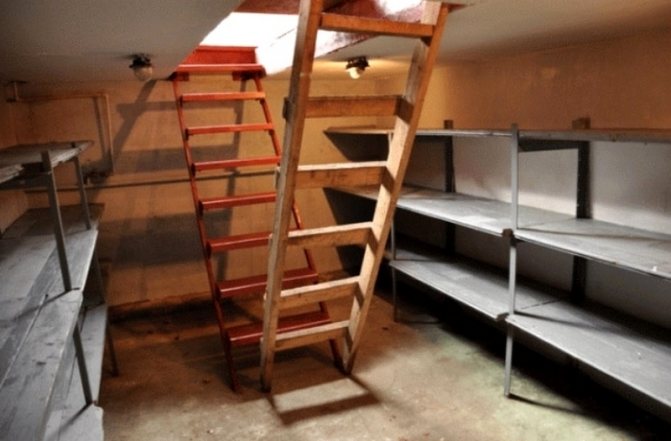
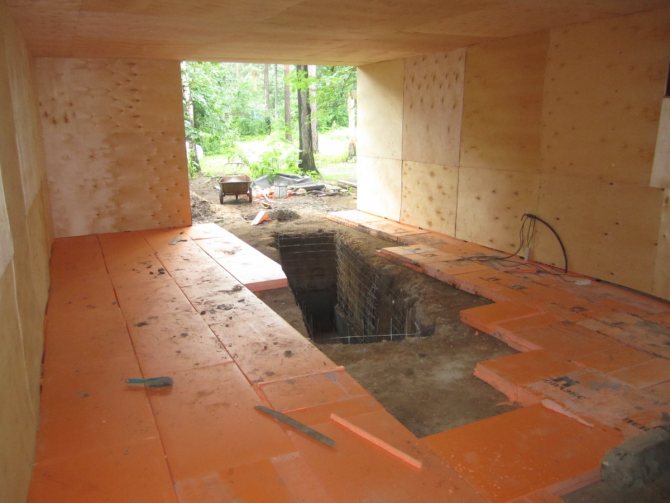
How the basement is made
All work should start with a project. It is on paper that it is easier to adjust the dimensions, calculate a comfortable staircase, and think about the depth. After the project is approved, you can start digging a hole. But given that this is happening in the garage, it will be impossible to drive special equipment there. So digging a hole by hand is still a pleasure.
Then you need to build walls, floors and make them decent waterproofing. Next, the walls are "decorated" with concrete with a reinforced screed. After the screed has dried, it will be possible to start building walls and arranging the floor. It should be recalled that the supply of all materials and solutions to the basement will be greatly limited by the size of the garage itself.
How to properly ventilate the basement
Consider several options for how to make ventilation in a basement storage with your own hands. The methods given below are the installation of a natural ventilation system, which can easily become forced or combined after the additional installation of exhaust / supply fans.
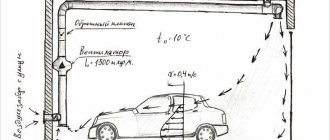
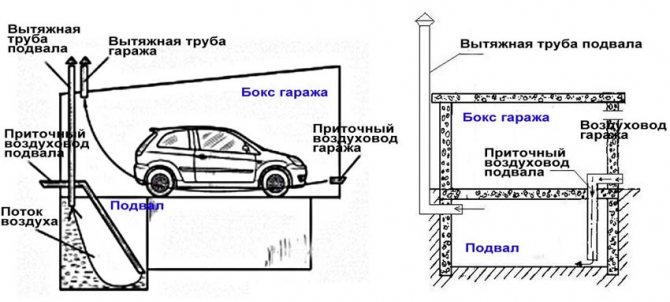
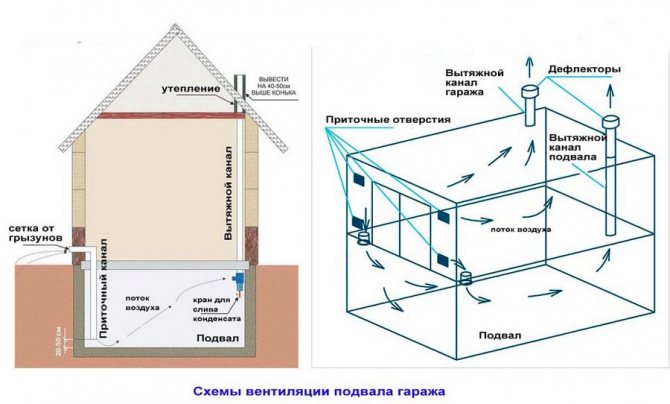
Garage + basement Very often, the ventilation ducts from the storage pass through the garage room and are taken out of it. There are two options for placing the air ducts.
Option 1. Do-it-yourself direct air supply outside the garage.
- Determine where the ventilation ducts will be located. The most effective option is opposite corners so that the incoming air covers the entire volume of the space as much as possible. In the outer wall of the building, the opening of the pipe outlet for the incoming air is marked strictly vertically above the supply basement opening.
- Calculate the required pipe diameter based on 1.5 cm of diameter per 1 m² of the room.
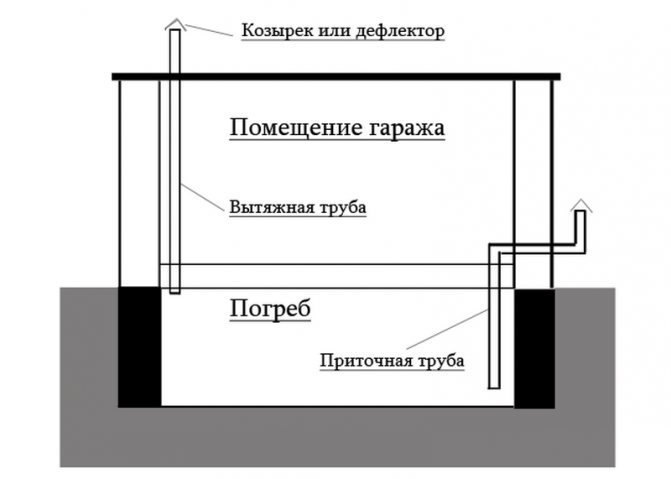
- Make openings inside the walls for the exhaust / supply air ducts of the appropriate size. It is important that the supply opening is located at a height of no more than 20 cm from the floor, and the exhaust opening is not lower than 10 cm from the ceiling, and preferably inside the ceiling. This will increase the difference in temperature, which means that the thrust will increase.
- Install air ducts (plastic, asbestos-cement, stainless steel, etc.). The chimney is led out through the garage as high as possible (to enhance air exchange). Minimum 50 cm above the garage roof.
- The supply channel is small; it is led through the garage to the outer wall of the building. The distance from the inlet opening to the end of the hood is from 250-300 cm.
- The main thing is that the diameter of the pipes retains its value along the entire length. Use as few folds as possible.
- After installing the air ducts, it is necessary to eliminate the gaps near the pipes using polyurethane foam, cement mortar.
- Outside, the supply outlet is closed by a grate protecting it from small animals and debris.
- The hood is equipped with a metal cover to protect it from atmospheric precipitation. A deflector can be installed to increase the draft of the duct.
- Dampers can be installed to regulate the air flow. Especially important in winter, with severe frosts. When it is necessary to maintain the temperature inside the basement, the supply duct is blocked by such a damper.
This is a general installation diagram for a natural ventilation system for a basement space. To organize forced (mechanical) or mixed ventilation, it is enough to install fans inside the air ducts, which will increase the circulation of air flows.
Option 2. Indirect air flow from the garage ventilation system.
The installation scheme is identical to the first option with the only difference that the supply duct goes inside the garage building. Fresh air is taken not from the street, but from the room itself, where it enters through the general ventilation. The supply air duct is located next to the ventilation grilles inside the door, or the supply opening inside the garage wall.
The disadvantage of this option is that toxic chemicals and fuel vapors enter the basement space together with fresh air. With effective air circulation, they are discharged outside. If the ventilation is poorly established, they can settle inside the storage.
Basement + observation pit
The device of the air exchange system, when there is an inspection pit next to the basement:
- For the basement, an exhaust duct is mounted, displayed above the garage roof (see.option 1).
- An exhaust pipe is also installed for the garage.
- Ventilation openings are made inside the garage door / outer wall, and air grilles are installed.
- Inside the pit, next to the ventilation opening of the gate, a supply pipe is installed through which fresh air will flow into the inspection compartment.
- In the opposite corner of the pit, another supply air duct is mounted through the wall, but for the basement.
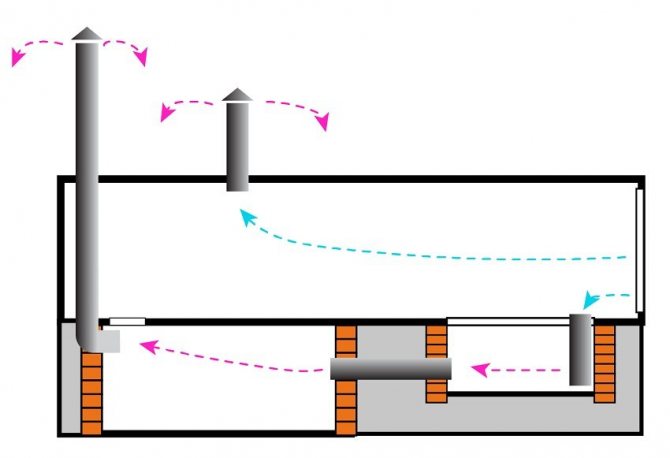
Air exchange is as follows. Through the ventilation grilles of the garage door / outside wall, the air flow enters the interior of the building, as well as into the inlet pipe of the inspection pit. Further, moving forward through the intermediate duct, it is inside the basement storage. After that, the exhaust air is removed by the exhaust duct. In parallel, stagnant air is removed from the garage room.
This method of organizing ventilation is good in that all rooms of the building are ventilated at once.
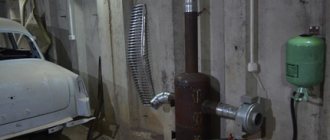
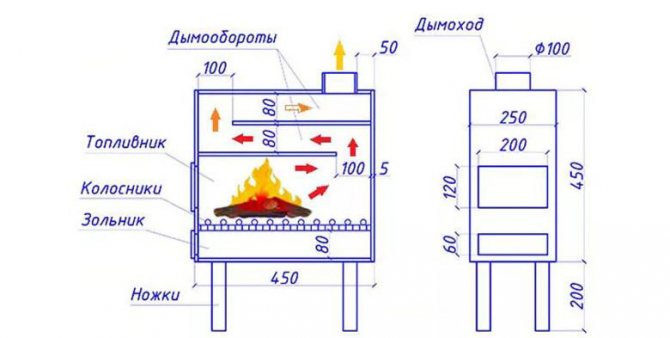
Installing a stove in a regular place
We have assembled the stove stove, now we will start installing it. For this, the foundation is being prepared. The stove cannot be installed on earthen floors - it will gradually push them through. It is necessary to pour a concrete screed on which the oven itself will stand. If ready-made concrete floors are available, there will be one less problem in the installation procedure. In the case of installing a potbelly stove on wooden floors, it is necessary to lay a sheet of metal 1-2 mm thick on them. The same sheet should be located in front of the firebox - this will prevent fire if the coals accidentally fall out.
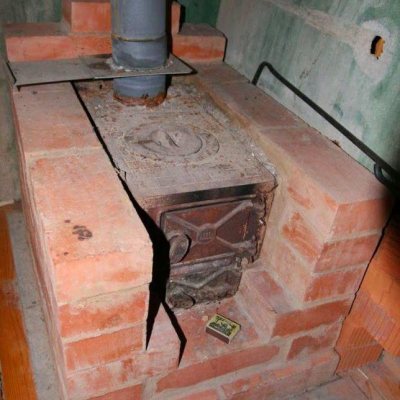
It is recommended to install a protective brick jacket. It prevents burns and ensures even heat dissipation.
To install the potbelly stove in the garage as correctly as possible, use the following recommendation - step back from the nearest walls 50-60 cm. Thus, you will avoid overheating and reduce heat losses. The recommendation is valid for brick, concrete and timber walls. In the case of wood, it becomes mandatory (the distance to the wooden wall should be 1 meter, it is recommended to cover them with bricks or sheathing with asbestos). You can also sheathe the walls with metal to reflect heat. The distance to vehicles is at least 1.5 meters (preferably 2 meters).
Read next: Cable for LPG 4
Heating the garage with a potbelly stove will be more effective if it is located not at the garage door, but at the opposite wall. We pay special attention to the vent - make sure that there is an opening in the garage for outside air. Otherwise, the oxygen level in the room will be too low.