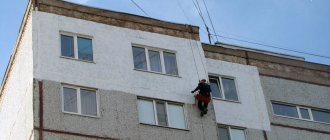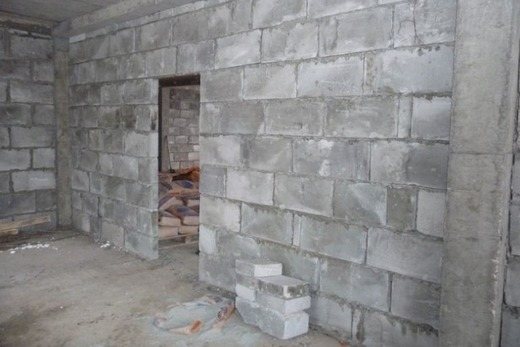

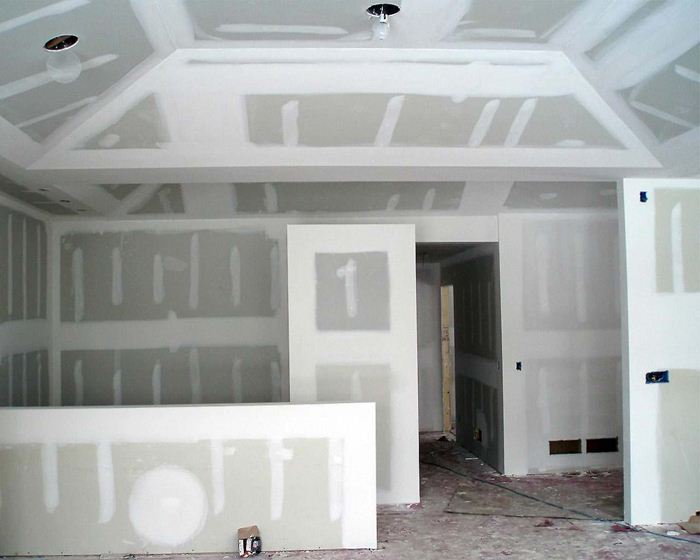
Building blocks made of lightweight aerated concrete have “squeezed out” ceramic and silicate bricks in low-rise construction. Low load on the foundation and high thermal insulation properties explain their popularity. And the interior decoration of walls made of foam blocks is carried out in the same ways and materials as in a brick house: plaster, drywall and painting. It is important to properly prepare the surface, and take into account the features of foam concrete.
Advantages of frameless wall alignment with drywall
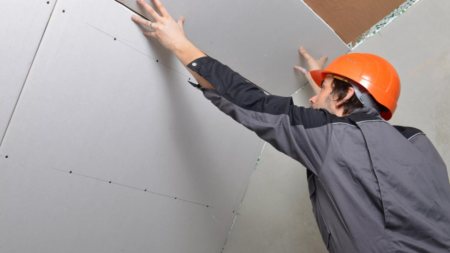
This leveling method is otherwise called dry plaster. Unlike the traditional method of fixing drywall to the frame, the frameless method is faster and saves more free space.
This alignment method can be performed under the following conditions:
- if the plane difference does not exceed 5 cm;
- if the laying of hidden communications and electrical wires is not supposed;
- if internal heat and sound insulation of the room is not expected;
- if the area of the room is too small and does not allow the construction of a frame structure, which will require more than 10 cm of additional space.
The advantages of frameless leveling of the base with drywall include the following:
- small thickness of the material saves free space;
- the ability to create a perfectly flat base for any finishing material;
- GKL sheet can be attached to a surface of any material;
- additional insulation and soundproofing of the room;
- high speed of work and easy installation;
- the cost of work is lower, since you do not need to buy materials for the frame.
The frameless method has its drawbacks:
- since no free space is formed between the base and the sheet, it will not work to hide the wiring or additionally insulate the room;
- depending on the base material, additional fixation of the panel may be required using self-tapping screws or dowels;
- after the glue is applied to the surface of the sheet, its weight increases, and it becomes problematic to do the work on your own - you cannot do without an assistant.
Note! To ensure a strong fixation of the gypsum board sheet to the base, it is necessary to choose the right adhesive.


What is such a finish
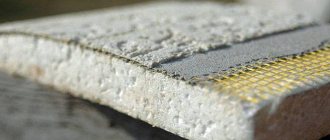
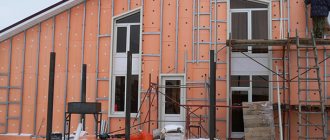
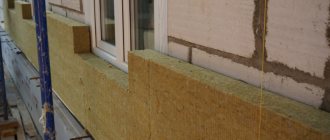
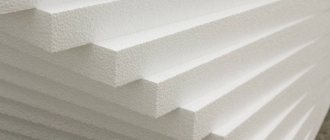
This is the simplest design, which makes it possible to lay the insulation of your choice on the wall, fix it and close it with ideally even material, ready for any type of finish. Naturally, there are technologies that allow you to work without GCR, but it is far from a fact that using them, you will be able to save well. Using, for example, expanded polystyrene and its external finishing, special mesh and plastering, leveling and putty, you will not reduce costs in any way.
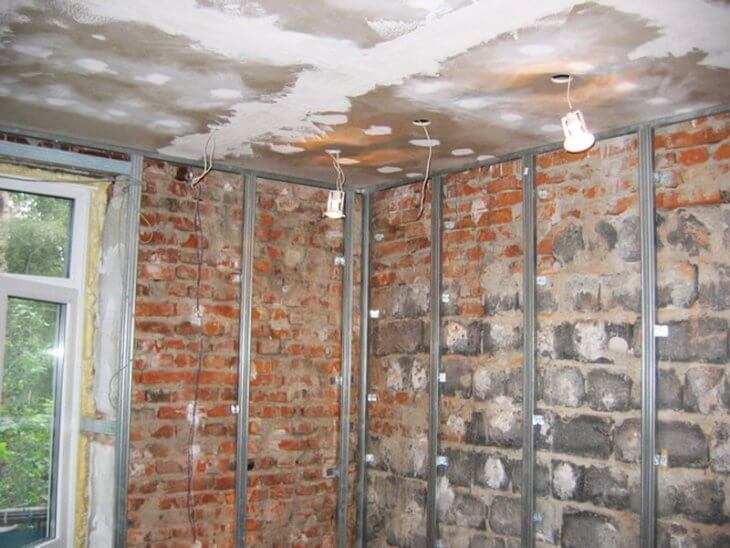
Applying the same drywall and metal profile. you can easily create a basis for laying insulation, as well as qualitatively update the walls, hiding irregularities and other defects of the wall, engineering communications under a layer of insulation and a plane of plaster.
The principle of frameless plasterboard wall cladding
Decorating a room with plasterboard sheets without arranging the lathing can be done in one of the following ways:
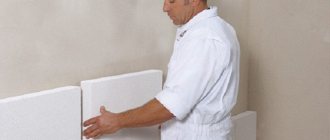
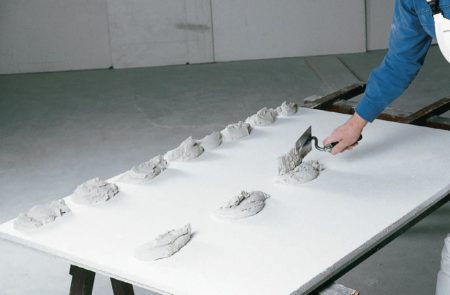
- The fastest and simplest method is called glue and involves fixing the sheets to the wall with glue, mastic or foam. The solution also allows you to level irregularities, with a greater amount of its laying in the place of the surface difference.On the back side of the sheet, the adhesive solution is applied in small parts, then the sheet is applied to the base and slightly pressed, giving it the required position in the plane. Control is carried out using a building level. A distance of 10 mm is left between the floor and the extreme sheet of the gypsum board.
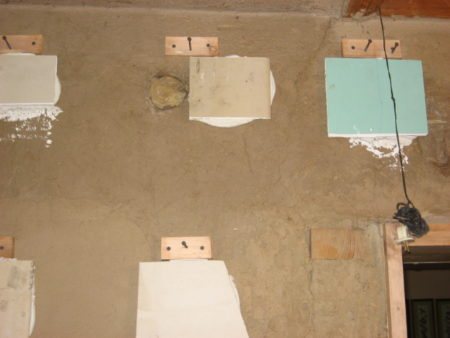
- The second method involves fixing dry plaster on self-tapping screws. Use it in the presence of serious differences in the base. On the back side, markings are made, and holes for self-tapping screws are drilled, pieces of foam rubber are glued next to it. Places of holes are transferred to the surface of the base, drilled out and a dowel is inserted. Then, using self-tapping screws, the sheet is fixed to the base.
- The third method combines the two previous ones: the beacons are fixed at the top and bottom, and the central part of the sheet is filled with an adhesive solution.
When choosing one or another method of fixing the sheets, the base material and the degree of its unevenness are taken into account.
Installation work can be done independently, without the involvement of specialists.


Mounting methods
Fastening drywall to the wall is done in two ways:
- frameless method;
- wireframe.
The frameless method is considered the simplest, since there is no need for the construction of a lathing for its implementation: drywall is attached with gypsum glue. But in order to use this method, the height of the ceiling must match the size of the sheet. Using the frame fastening method, you can finish the wall up to 10 meters high.
Installation of gypsum board in both ways is carried out in the process of interior decoration before laying the floor covering. Work on the laying of electrical wiring, heating systems, water supply and sewerage by the time the walls are lined with plasterboard must be completed.
Preparatory activities
Despite the fact that the frameless method is considered faster, it still requires some preparation of the base. The quality and durability of the result depends on this.
Preparation includes the following activities:
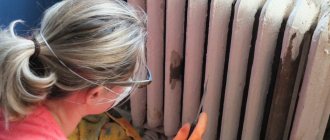
- In the presence of an old paint coating, notches are made on the surface of the base with a sharp tool, for example, an ax, or a grinder to increase the adhesion of the base with an adhesive solution. If it is possible to remove the paint, then it is removed completely.
- Leaving cracks and cracks on the surface of the base is unacceptable. They will need to be putty. Foam can be used to fill deep grooves and holes. Its advantage lies in the ability to expand and penetrate into inaccessible places, completely filling all voids. The foam is left to dry completely (the time is indicated on the package), and then the excess protruding above the wall is cut off.
- The cleaned surface is dedusted and covered with a primer with antiseptics. It will not only increase adhesion, but also prevent mold from forming under the sheathing. As a rule, the primer is applied in two times, allowing each layer to dry completely.
- A clean, primed surface is checked for verticality using a level, long rule, or plumb line.
The method of further alignment depends on the degree of curvature of the base. Some of the activities are related to additional training or initial leveling, and can be done in several ways.
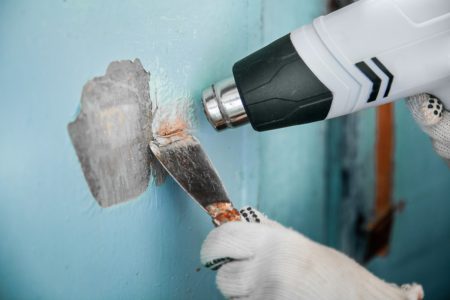
To make old paint easier to clean off, you can use a construction hairdryer.
Cost of work
Installation of drywall without a frame for 1 square meter costs from 500 rubles. The exact prices can be found in the construction company when contacting, they are calculated taking into account all the nuances, in accordance with the project.
Installation can include the following work: sheathing of pipes and communications, installation of heat and sound insulation, putty, priming of the surface for painting on gypsum board.
- To increase the lifespan of drywall
, after gluing it to the wall surface, it will be useful to fix the sheets with dowel-nails. To do this, holes are created in the drywall around the perimeter, in increments of 40 centimeters, dowels are inserted into which nails should be hammered. The head of the nail should enter the surface of the sheet. - Surface priming is required.
It allows not only to increase the adhesion of the material to the wall, but also to fill in irregularities that may be invisible at first glance. - After the glue dries
, seams and gaps at the ceiling must also be primed. The bottom gap can be simply removed under the skirting board. If desired, a ceiling plinth can also be installed on top. - If moisture resistant cardboard is used
, it is necessary to ensure that the material is fixed precisely with the front side outward, since they have some features in the structure that prevent the sheet from getting wet and the appearance of fungus and mold.
Measuring the wall
... This is necessary in order to plan the future placement of drywall sheets. It is also necessary
avoid cruciform joints
because the sheets will be offset.
Wall surface preparation
... At this stage, the surface should be cleaned of old wallpaper, traces of paint, whitewash. It is necessary
identify protrusions on the wall, then mark them with chalk
... Further, a soil mixture is applied to the wall in several layers and dries completely.
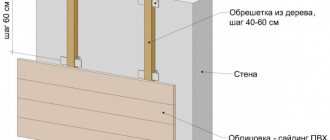
Before fixing the frame to the wall, it is necessary to cut strips 100 mm wide from drywall, after which one of the sides is covered with a primer. Next, glue is applied to the strips, then they are glued along the wall, one close to the ceiling, the second to the floor. Be sure to consider the fact that you need to work with glue as quickly as possible
, you should not knead a lot at once.
Preparation of the bulk of the glue
... For this, slow-setting gypsum mixtures or stucco are often used. In the second case, it is necessary to prolong solidification by adding PVA glue to the adhesive. Therefore, if you want to attach drywall to a wall without a frame, while acting carefully, you must provide for these details.
Fastening sheets to the wall
... The thickness of the adhesive layer will depend on the degree of curvature of the surface. If it is relatively flat, then you can glue it directly onto it. The application of the adhesive is carried out
notched trowel
, to perform the technology, he or a trowel can be used.
Fastening drywall to a wall without a frame involves aligning the large curvature of the walls, for this, special "Lighthouses"
, which are made of plasterboard strips. Usually they are glued vertically along the perimeter, the interval is 40-50 cm. From the very beginning, left and right beacons are set, and then, when using a fishing line that is stretched between them, vertical stripes are attached. As for the upper as well as the lower horizontal beacons, they are aligned using a certain rule that presses the drywall sheets.
Installation of drywall on walls without a frame is performed in a few simple steps, and they need to be done gradually.
After applying the glue, it is necessary take pads 10-20 mm in size
from the floor and install a drywall sheet on them. Thanks to this technique, compensation for the elongation of the sheet will be provided at a time when the humidity and temperature in the room change. Sheet needed
align
using a special rubber mallet, tapping it lightly.
After gluing the drywall to the wall and hardening the glue, it is necessary to fix it with dowel-nails
... Thus, the durability as well as the reliability of the fastening can be increased.To do this, you need to drill a hole in the drywall, then insert a dowel into which a nail is hammered. It is necessary to hit the nail until the cap is completely sunk in the drywall. In this case, the main thing is not to overdo it and not damage the drywall.
Thus, the wall cladding with plasterboard without a frame is carried out as quickly as possible, if you follow the sequence of actions.
Primary alignment
If the wall is uneven and simple gluing of the sheet does not correct the situation, then it is recommended to first remove one plane and then glue the drywall. This will save glue and avoid the formation of voids between the sheet and the wall.
In the first case, for the manufacture of lighthouses, you can use fragments of drywall, fixed to the wall on a gypsum mortar. The alignment process is as follows:
- Depending on the degree of unevenness of the wall, pieces or strips of drywall are cut. When points of differences are identified on the wall, they are marked with a marker or crayon.
- The highest and lowest place on the plane of the wall is determined, and they are brought out into one plane, adjusting the amount of solution under a piece of drywall. These elements will become a guide when attaching the remaining beacons.
- Fix the rest of the beacons, creating a single plane. If the recess is too large, then you can make a lighthouse from two superimposed fragments.
When the gypsum solution has completely hardened, you can proceed to fastening solid sheets of drywall.
Combined pre-alignment method
In the second case, the plane is taken out using self-tapping screws:
- First, you will need, as in the first case, using measuring tools to determine the lowest and highest point on the wall, and mark them with chalk.
- In the same way, determine and mark the rest of the places where the screws will be screwed. The distance between them should be 20 - 30 cm.
- The plane is first taken out for the first two screws, twisting so that their caps are on the same level. Then the rest of the screws are fitted.
- When the plane is formed, self-tapping screws along the entire height are covered with glue or plaster mortar. It is necessary to align it with the caps.
In the future, the sheets are glued to the resulting beacons.
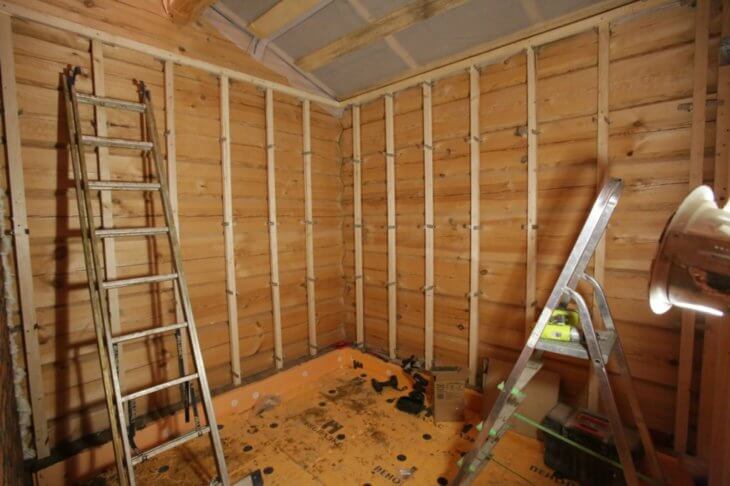
Characteristics of sawdust as insulation
Wood has a low thermal conductivity, which makes it a good heat insulator. At the same time, the layer of wood sheathing has a considerable weight, creating a significant load on the surfaces to be insulated. In addition, the cost of such insulation is extremely high. Sawdust is a waste of woodworking that costs almost nothing. From a physical point of view, sawdust is a large number of wood particles, there are air cavities between them, which in themselves are a good heat insulator. The resulting combination allows for high-quality heat saving. The density of such a material is much lower than the density of solid wood, therefore its weight is much less and does not create a noticeable load on the supporting structures. In addition to its main function, sawdust is able to provide high-quality sound insulation, increasing the comfort for people living in the house.
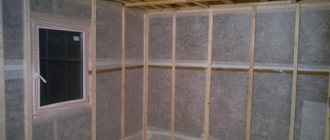
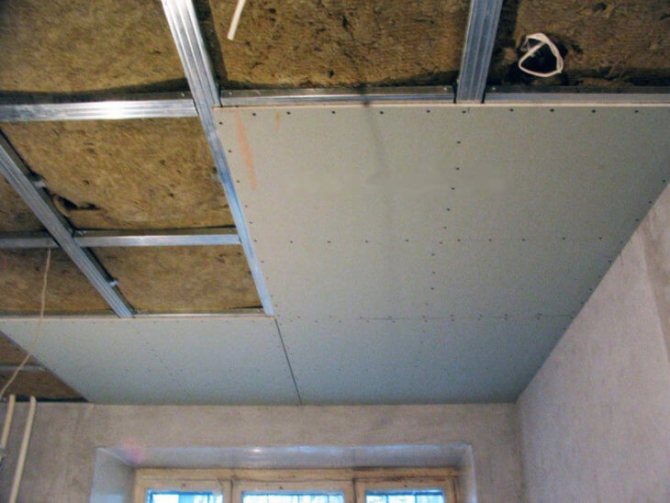
Sawdust is used as insulation for roofs, floors, walls and ceilings
The main feature of sawdust is that they are free-flowing material, which limits the use of only horizontal surfaces. The solution to the problem was the binding of sawdust with other components that give rigidity and the ability to maintain a given shape. Thanks to this, it became possible to use the material for any surfaces, both horizontal and vertical.
It is important! It is necessary to distinguish between sawdust and shavings.In most cases, the term "sawdust" means just chips, which have great elasticity, are able to retain their shape and retain heat. It is formed as a result of machining wood on planing equipment.
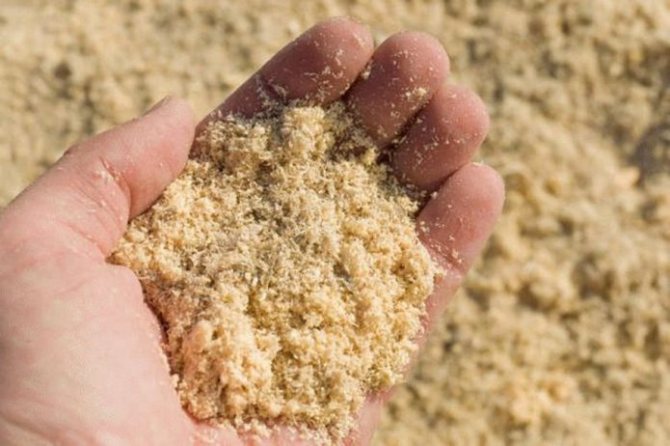
Sawdust itself is small wood chips that are formed during sawing and have a greater density and weight. It has a smaller volume of air spaces, is prone to caking and can be compacted to a state close to solid wood.
The layer of shavings is looser and lighter. The sawdust layer is dense, heavy. When choosing a material, one must distinguish between these types and take shavings that have a more successful set of properties.
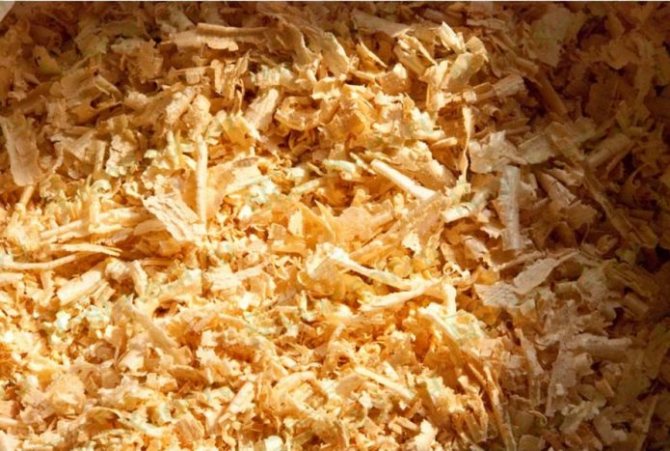
Pine and spruce wood chips are mainly used for insulation, since conifers contain more lignin
Installation process
Fixing GKL sheets to a wall without a frame can be done in different ways. But first, it is necessary to assess the verticality of the base, and mark the landmarks on the ceiling and floor - lines that will indicate the required degree of alignment of the wall along the length.
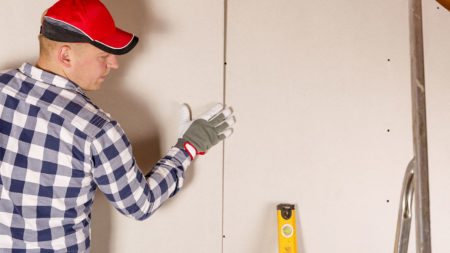
When performing work, it is important to control the position of the sheet in the plane
In order for the work to be done quickly, it is recommended to cut drywall to the entire room at once. To avoid horizontal joints, it is better to immediately acquire sheets, taking into account the height of the walls.
Finishing
Each crevice and joint must be properly filled with putty, but all surfaces are well primed beforehand. Several coats of primer may be needed, each of which should be allowed to dry. After the primer, putty and sealing of joints with serpyanka, leveling of defects, chips and scratches, where you can also use special auxiliary materials.
When the putty is laid on the surface, it must be given time to dry well, and then, only to wipe it with fine sandpaper, creating a flat surface. Usually, primer is again laid on top of the putty so that the wall is not a brand, and also because of the better adherence of decorative materials to the surface of the plasterboard wall.
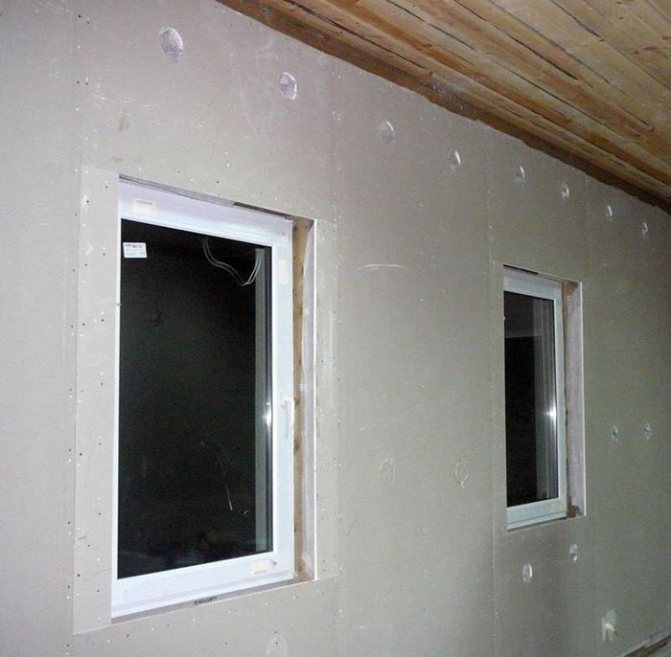
Rough wall decoration is an important stage before their decorative design
It is possible to insulate the walls with plasterboard and special heaters in any indoor room where the humidity and temperature are normal. Therefore, you should not wait any longer and endure the cold, you just need to choose the time and increase the energy saving of your home on your own.
Adhesive fixation method
The amount of adhesive that will be applied to the back of the sheet depends on the level of curvature of the wall. If the difference is less than 4 mm, spread the adhesive evenly around the perimeter of the sheet using a notched trowel. If the differences are greater, then the thick glue is applied in portions 5 cm high in 30 cm increments.
The whole process looks like this:
- The cleaned wall is primed and dried.
- Building glue with a gypsum base is diluted.
- On the back of the gypsum board with a step of 20 - 30 cm, lay out portions of the adhesive composition.
- The sheet is set in the required position and pressed against the wall.
- Using a level, check the position of the sheet horizontally, vertically and diagonally. Corrections are made immediately if necessary.
- The rest of the sheets are fixed, guided by the first so that the gap between them does not exceed 2 mm.
Drywall with glue applied to it becomes quite heavy, so you need to attach it to the wall together. If the work is to be done alone, then experts recommend changing tactics and applying the solution to the wall. Or cut the sheets into separate fragments, but in this case, horizontal joints will appear. Such an installation is carried out with a breakdown of the seams, as when laying bricks.
Glue application process
When the installation is completed, proceed to the putty of the joints. Initially, they can be reinforced with a serpyanka.In places of window and door openings, as well as in the corners, plastic or metal perforated corners are installed. When the putty dries up, sand it and apply the finishing putty to the entire wall.
Fixation with polyurethane foam
When the wall is too curved, and there is no time for its preliminary leveling, then the installation of drywall can be done using polyurethane foam. The specifics of this material should be taken into account - after spraying, the foam increases in volume, and after a while, a secondary expansion occurs. Therefore, experts recommend that you carefully approach the choice of foam. On the packaging, the manufacturer indicates the degree of expansion of the material - for installation work, if the wall is initially flat, the composition with the minimum value is chosen.

Excess foam is cut off after it dries, and additional fixation on self-tapping screws holds the sheets when the foam re-expands
This mounting method has its advantages:
- saving finances;
- additional noise and heat insulation;
- durability;
- high adhesion to any surface.
Provided that the wall is initially flat, work is performed in the following sequence:
- Preparatory measures are carried out and the degree of unevenness of the wall is revealed.
- Expose beacons from scraps of plasterboard, as described earlier.
- In advance, holes are made in the sheet for self-tapping screws, so that they coincide with the locations of the beacons.
- Foam is applied to the sheet - along the perimeter and crosswise.
- GKL is applied to the base, set in level and screwed to the linings with self-tapping screws.